

How to Create Articles in Sanity Studio
This step-by-step tutorial will guide you through creating articles for the Information Center section of the Popay POS website. These articles serve as help documentation, guides, and knowledge base content for your users.
What you'll create:
 An example article page as it appears on your website
What are Articles?
Articles (also called Information Cards) are help documentation pieces that appear in the Information Center on your website. They're designed to:
- Answer common questions
- Provide step-by-step guides
- Explain product features
- Help users troubleshoot issues
- Document processes and workflows
Articles are organized by category and displayed with difficulty levels and estimated read times to help users find relevant content quickly.
Prerequisites
- Access to Sanity Studio at https://popay.sanity.studio/
- Logged in with proper credentials
- Understanding of your target audience's needs
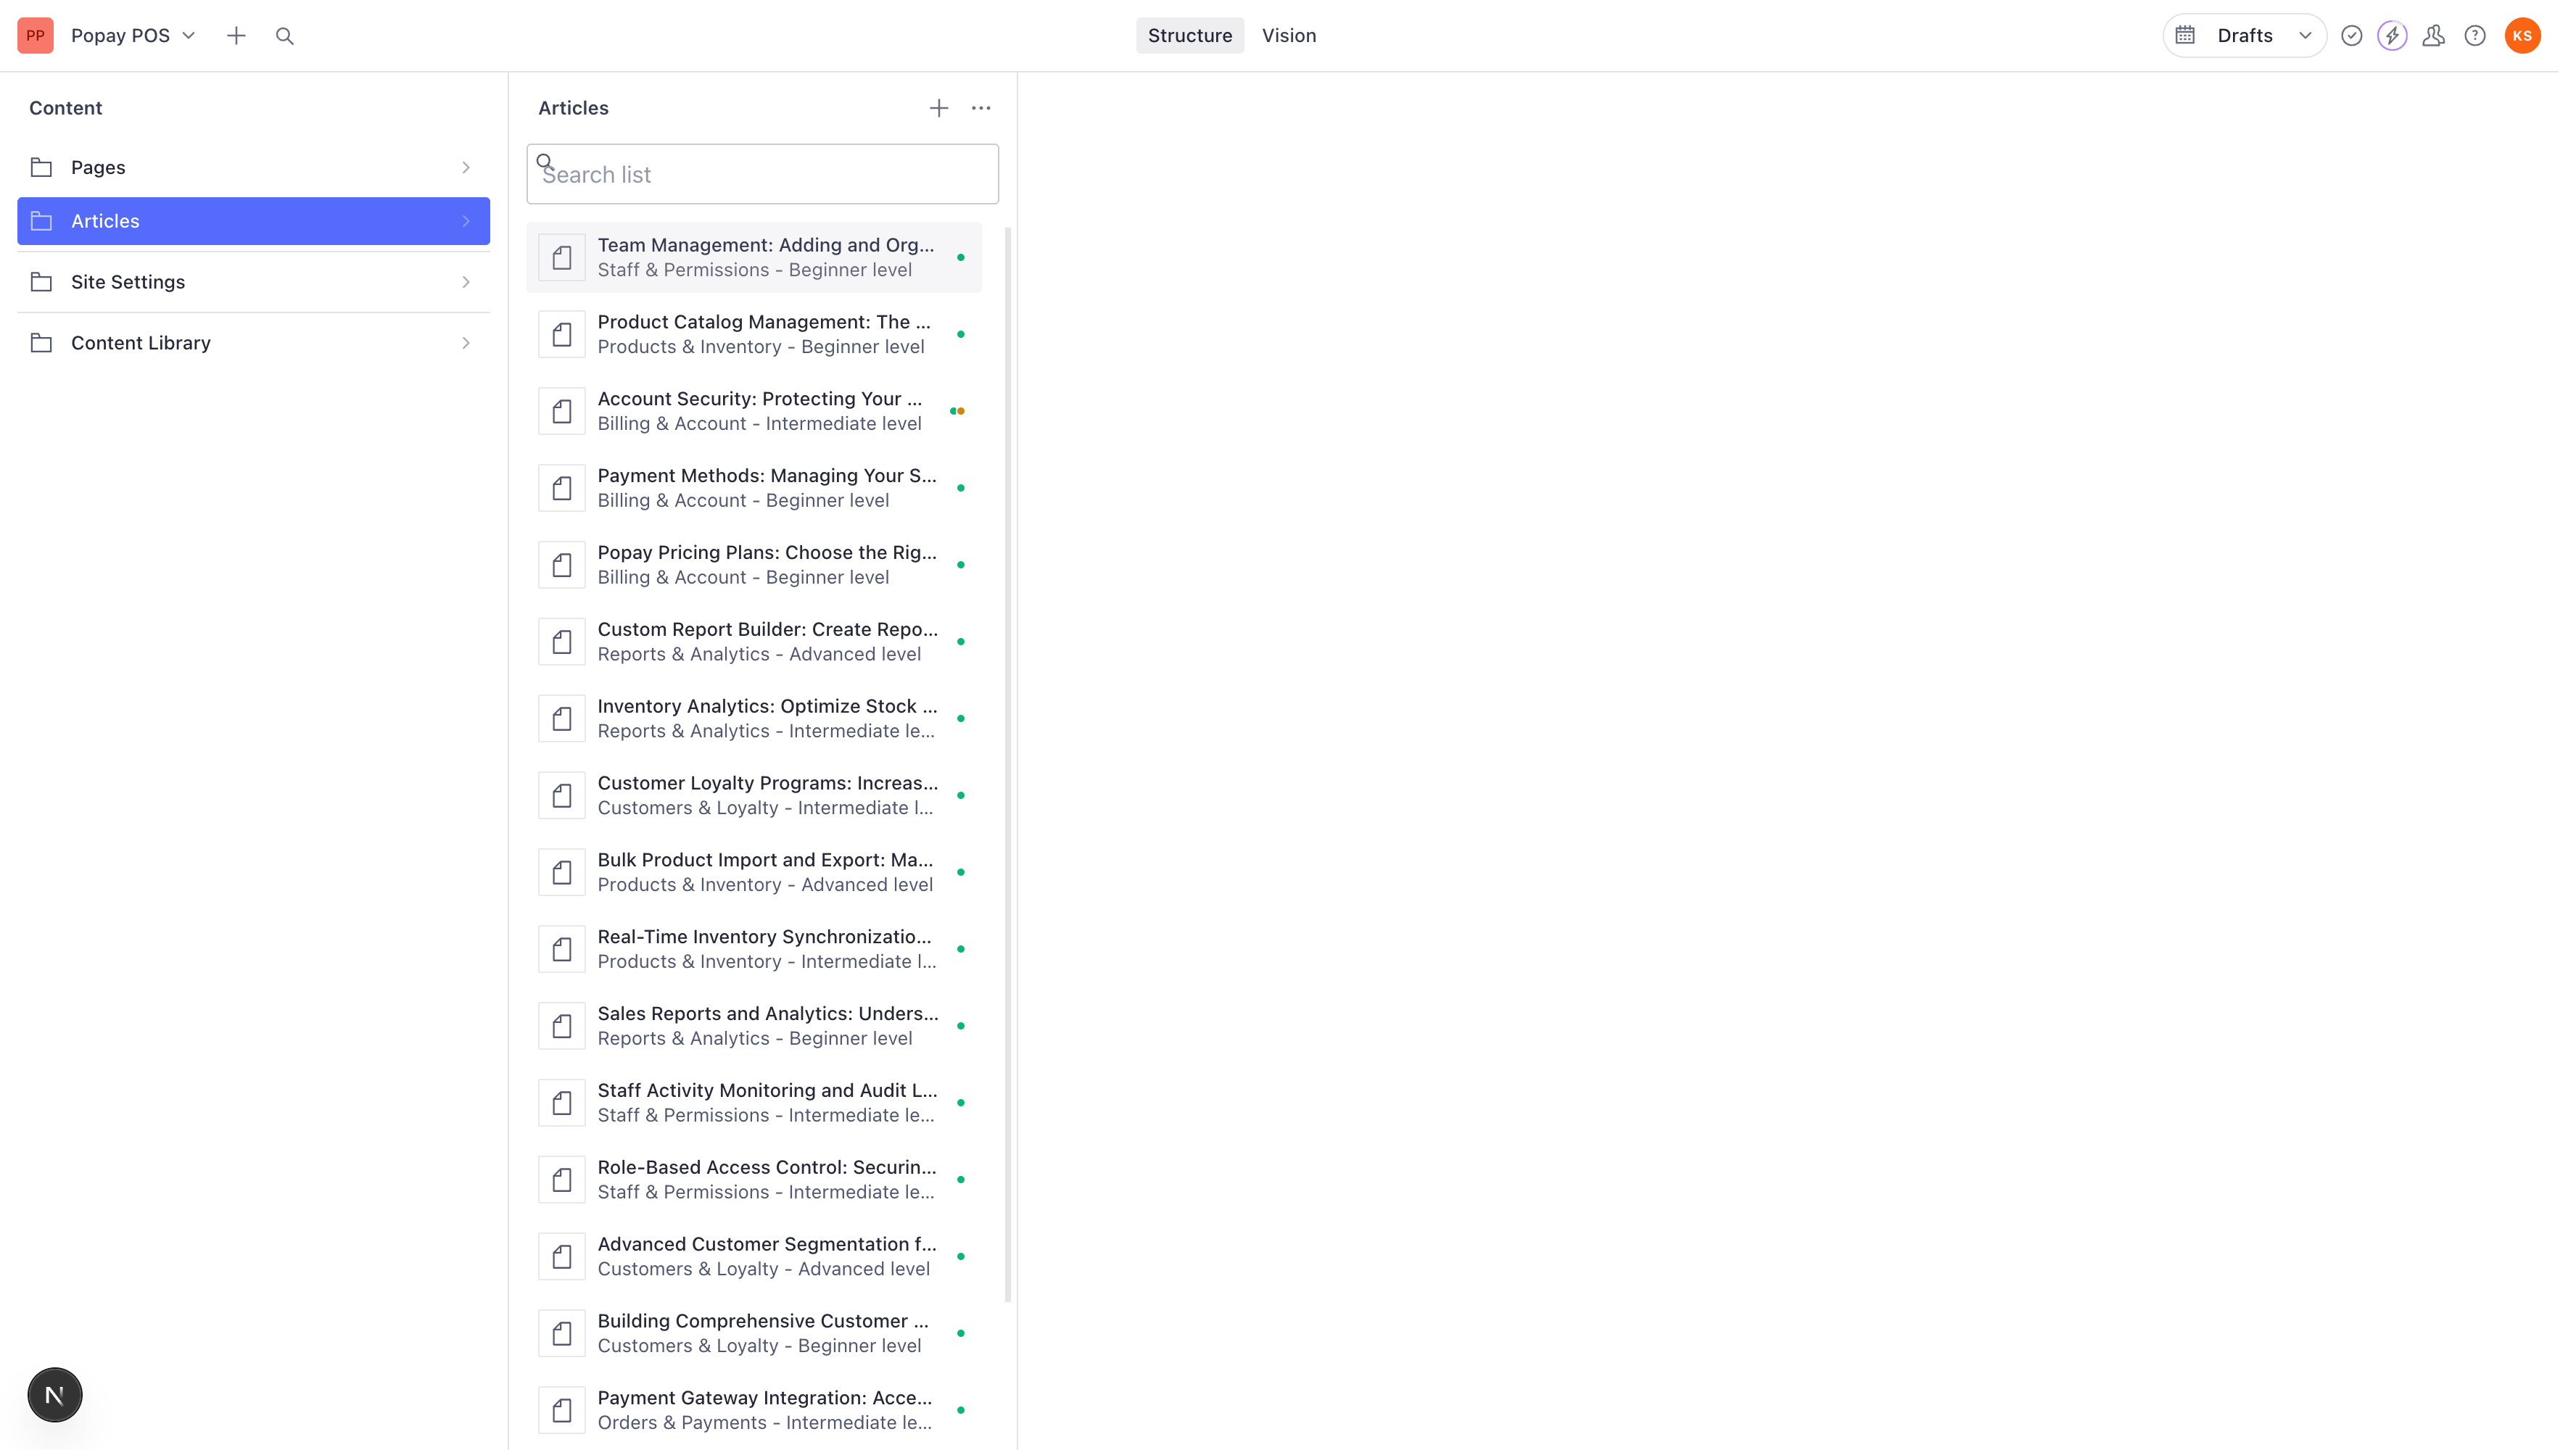
Step 1: Navigate to Articles Section
- Open Sanity Studio in your browser
- In the left sidebar, click on Articles
You'll see a list of all existing articles organized by category.
Step 2: Create a New Article
There are two ways to create a new article:
Method 1: Using the + Icon
- Click the + icon next to "Articles" at the top of the middle panel
- This creates a blank article
Method 2: Using the Button
- Look for the "Information Card" button
- Click it to create a new article
Both methods open the same article editing form.
Step 3: Understanding the Article Form
The article form contains these fields:
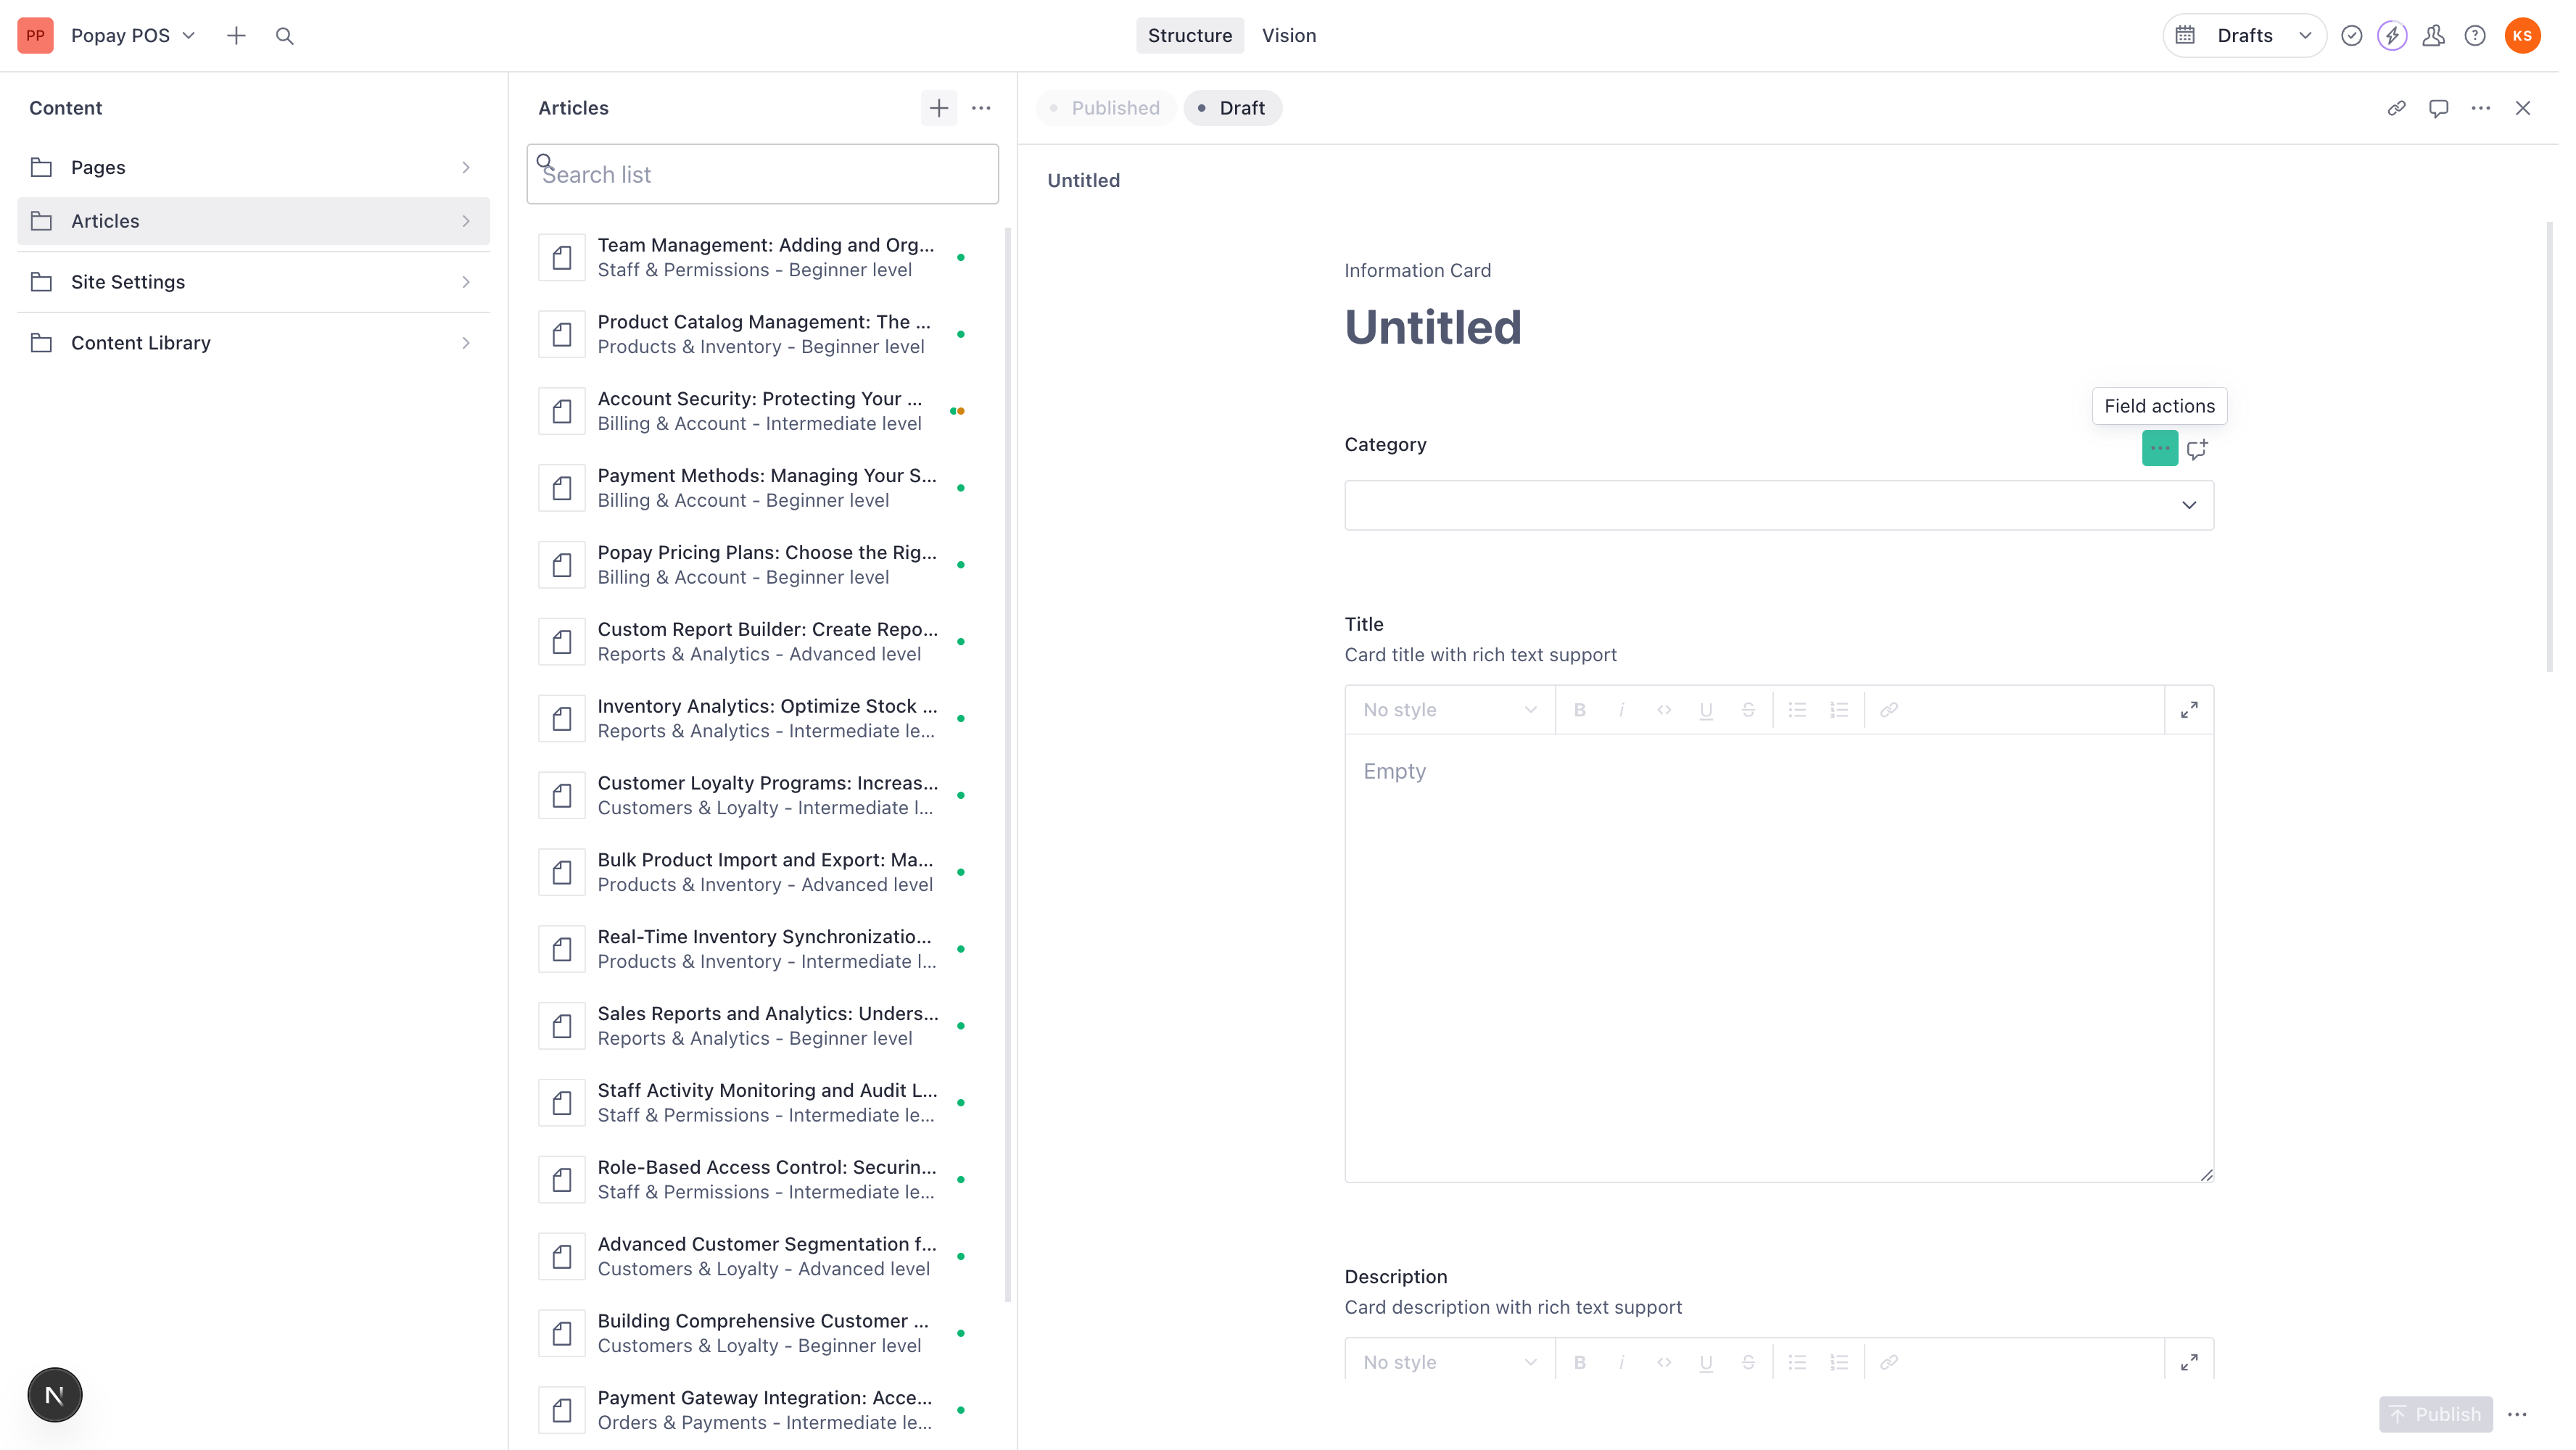
Required Fields (marked with *)
- Category * - The topic category (Orders & Payments, Products & Inventory, etc.)
- Title * - Article headline with rich text formatting
- Description * - Brief summary that appears in article cards
- Read Time * - Estimated reading time in minutes (default: 4)
- Article Slug * - URL path for the article
Optional Fields
- Difficulty Level - Beginner, Intermediate, or Advanced (default: Beginner)
- Link - Custom URL (overrides slug) for external links
- Published - Checkbox to make article visible (default: checked)
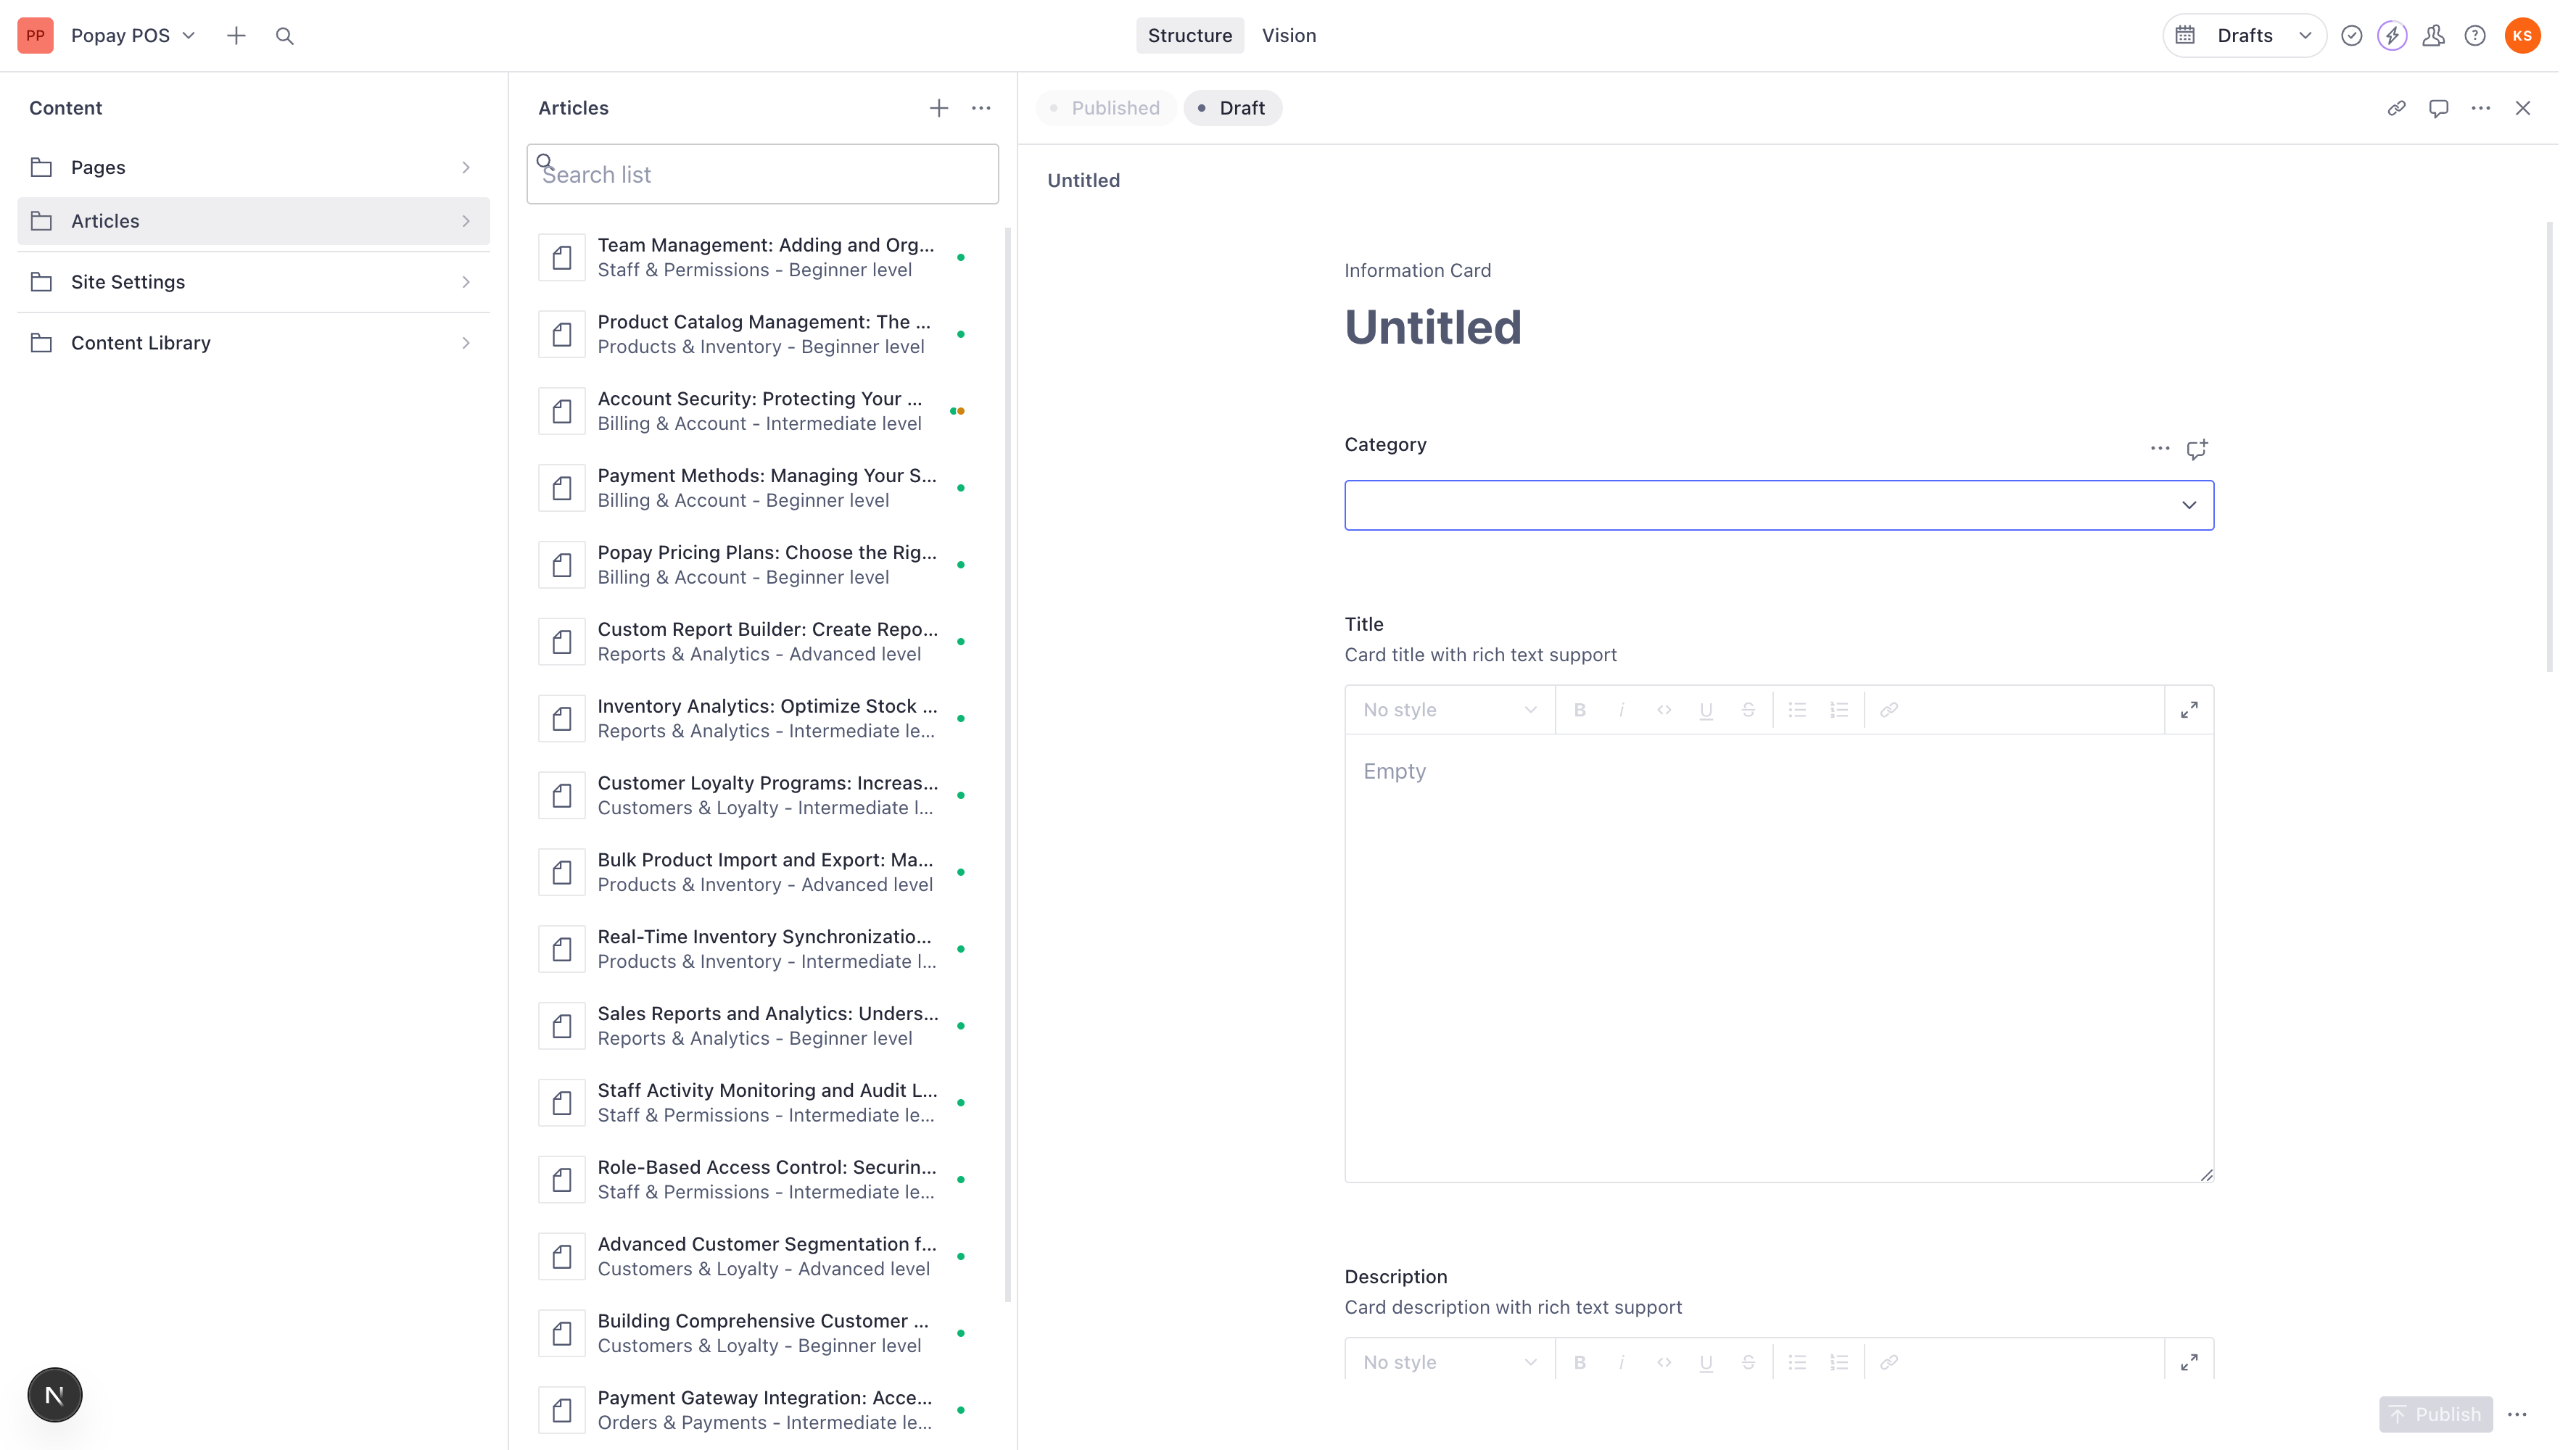
Step 4: Select a Category
The first step is choosing the right category for your article.
Click the Category dropdown and select from:
Available Categories
-
Orders & Payments
- Processing orders
- Payment methods
- Refunds and returns
- Transaction issues
-
Products & Inventory
- Adding products
- Stock management
- Product variants
- Pricing rules
-
Customers & Loyalty
- Customer accounts
- Loyalty programs
- Customer groups
- Purchase history
-
Staff & Permissions
- User roles
- Access control
- Staff management
- Permission settings
-
Reports & Analytics
- Sales reports
- Analytics dashboard
- Export data
- Performance metrics
-
Billing & Account
- Subscription management
- Billing information
- Account settings
- Plan upgrades
Choose the category that best matches your article's topic. Users browse articles by category, so accurate categorization is important.
Step 5: Write Your Article Title
The title field uses a rich text editor (WYSIWYG) that supports formatting.
Writing a Great Title
Good Article Titles:
- ✅ "How to Process a Refund"
- ✅ "Adding New Products to Your Inventory"
- ✅ "Understanding Customer Loyalty Points"
- ✅ "Setting Up Staff Permissions"
Poor Article Titles:
- ❌ "Refunds" (too vague)
- ❌ "Click here to learn about products" (not descriptive)
- ❌ "PRODUCTS!!!!" (unprofessional)
Using the Rich Text Editor
Click in the Title field to start editing. The toolbar appears with formatting options:
| Button | Function | Keyboard Shortcut |
|---|---|---|
| No style | Remove formatting | - |
| B | Bold text | Cmd/Ctrl + B |
| I | Italic text | Cmd/Ctrl + I |
| Code/monospace | Cmd/Ctrl + E |
| U | Underline | Cmd/Ctrl + U |
| S | Strikethrough | Cmd/Ctrl + Shift + X |
| • | Bullet list | - |
| 1. | Numbered list | - |
| 🔗 | Add link | Cmd/Ctrl + K |
Best Practice: Keep titles simple. Bold or italic can be used for emphasis on specific words, but avoid over-formatting.
Step 6: Write Your Article Description
The description is a brief summary (1-3 sentences) that appears on the article card in the Information Center grid.
Writing Effective Descriptions
Purpose: Help users quickly understand what the article covers before clicking.
Good Descriptions:
- ✅ "Learn how to process full or partial refunds for customer orders. Includes step-by-step instructions and troubleshooting tips."
- ✅ "Add new products to your inventory in minutes. Configure pricing, variants, and stock levels easily."
Poor Descriptions:
- ❌ "This article talks about stuff." (not specific)
- ❌ "Read this article." (not helpful)
- ❌ [Very long paragraph of 10+ sentences] (too long)
Description Guidelines
- Keep it to 1-3 sentences
- Mention the key benefit or outcome
- Include relevant keywords
- Use action-oriented language
- Summarize the article's contents
Step 7: Set Difficulty Level
Choose the appropriate difficulty level for your article:
Difficulty Levels Explained
Beginner level (Default)
- For new users
- Basic concepts and features
- Step-by-step with screenshots
- Minimal technical knowledge required
- Examples: "Creating Your First Order", "Adding a Product"
Intermediate level
- For users familiar with basics
- More complex workflows
- Assumes some prior knowledge
- Examples: "Setting Up Product Variants", "Creating Custom Reports"
Advanced level
- For power users
- Technical features
- Complex configurations
- API integrations
- Examples: "Custom Payment Gateway Integration", "Advanced Reporting with SQL"
Tip: When in doubt, choose "Beginner level". It's better to over-explain than confuse users.
Step 8: Set Read Time
Enter the estimated reading time in minutes.
How to Estimate Read Time
Formula: Word Count ÷ 200 words per minute
Examples:
- 400 words = 2 minutes
- 800 words = 4 minutes (default)
- 1,200 words = 6 minutes
- 1,600 words = 8 minutes
- 2,000 words = 10 minutes
Guidelines:
- Minimum: 1 minute
- Maximum: 60 minutes
- Round up (3.5 min → 4 min)
- Include time for following steps
- Account for screenshots/diagrams
Default Value: The system sets 4 minutes by default, which works for most articles.
Step 9: Generate Article Slug
The slug is the URL path for your article.
Auto-Generate Slug
- After writing your title, click the Generate button next to "Article Slug"
- The system automatically creates a URL-friendly slug
- The article will be accessible at:
/docs/[your-slug]
Examples:
- Title: "How to Process a Refund" → Slug:
how-to-process-a-refund - URL:
yoursite.com/docs/how-to-process-a-refund
Manual Slug Editing
You can manually edit the slug if needed:
- Keep it short and descriptive
- Use lowercase letters
- Separate words with hyphens (-)
- Avoid special characters
- Don't use spaces
Good Slugs:
- ✅
process-refund - ✅
add-products - ✅
loyalty-program-setup
Poor Slugs:
- ❌
(not descriptive)article1 - ❌
(use hyphens, not underscores)how_to_process_a_refund - ❌
(no spaces or special chars)Process Refund!!!
Step 10: Optional - Add Custom Link
In most cases, you'll use the auto-generated slug. However, you can add a custom link for special cases:
When to Use Custom Links
External Documentation:
Link: https://docs.external-service.com/integration-guide
PDF Documents:
Link: /downloads/user-manual.pdf
Video Tutorials:
Link: https://youtube.com/watch?v=example
Note: If you provide a Link, it overrides the slug. The article card will link to the custom URL instead of
/docs/[slug]Best Practice: Only use custom links when absolutely necessary. Keep documentation within your site when possible.
Step 11: Set Published Status
The Published checkbox controls whether your article is visible on the website.
Published Status Options
✅ Checked (Published)
- Article appears in Information Center
- Users can find and read it
- Included in search results
- Listed in category pages
❌ Unchecked (Draft)
- Article hidden from website
- Not accessible to users
- You can continue editing
- Preview internally
Publishing Workflow
Recommended workflow:
- Create article with "Published" unchecked
- Write and edit content
- Review for accuracy
- Check formatting and links
- Check "Published" when ready
- Click Publish button (top right)
Quick Publishing:
- Leave "Published" checked by default
- Write your content
- Click Publish when done
- Article goes live immediately
Step 12: Writing Article Content
Although not shown in the basic fields, articles may have additional content fields depending on your setup.
Content Writing Tips
Structure Your Article:
- Introduction - What problem does this solve?
- Prerequisites - What do users need first?
- Step-by-Step Instructions - Clear, numbered steps
- Troubleshooting - Common issues and solutions
- Next Steps - Related articles or actions
Use Clear Language:
- Short sentences (15-20 words)
- Active voice ("Click Submit" not "Submit button should be clicked")
- Simple words (not jargon)
- Consistent terminology
Format for Readability:
- Use headings (H2, H3)
- Break up text with bullets
- Add numbered steps for procedures
- Include screenshots when helpful
- Use bold for UI elements ("Click Save")
Be Specific:
- Don't say: "Click the button"
- Do say: "Click the Submit Order button"
- Include exact field names and labels
- Specify locations ("top right corner")
Step 13: Using the WYSIWYG Editor
The rich text editor provides powerful formatting options.
Text Formatting
Bold - Use for:
- UI elements (buttons, menus)
- Important warnings
- Key terms on first use
Italic - Use for:
- Subtle emphasis
- Book/document titles
- Foreign terms
Code - Use for:
- Technical terms (
,API
)JSON - Code snippets
- File names (
)config.json - URLs that shouldn't be links
Underline - Use sparingly:
- Can be confused with links
- Better to use bold instead
Strikethrough - Use for:
- Showing corrections
- Deprecated features
Lists
Bullet Lists - Use for:
- Unordered items
- Feature lists
- Options/choices
Numbered Lists - Use for:
- Sequential steps
- Procedures
- Rankings
Links
Creating Links:
- Highlight the text
- Click the link icon (🔗)
- Enter the URL
- Press Enter
Link Best Practices:
- Use descriptive text (not "click here")
- Link to related articles
- Test links before publishing
- Use relative URLs for internal links (
)/about
Full-Screen Editing
For distraction-free writing:
- Click the expand icon (⛶) in the toolbar
- Editor fills your screen
- Focus on content without sidebars
- Press Escape to exit
Step 14: Preview Your Article
Before publishing, review your article:
Checklist Before Publishing
- Category is accurate
- Title is clear and descriptive
- Description summarizes the content
- Difficulty level is appropriate
- Read time is estimated correctly
- Slug is generated and correct
- No typos or grammatical errors
- Formatting looks good
- Links work correctly
- Published checkbox matches intention
Step 15: Publishing Your Article
Once you're satisfied with your article:
- Ensure Published checkbox is checked (if you want it live)
- Click the Publish button in the top right
- Your article is now live in the Information Center!
Publishing Indicators
Draft Status:
- Yellow "Draft" badge visible
- Article saved but not public
Published Status:
- Green "Published" badge visible
- Article live on website
- Accessible to all users
Auto-Save:
- Changes auto-save as you work
- Look for "Saved" indicator
- But you must click "Publish" to make it public
Step 16: Finding Your Published Article
After publishing, locate your article on the website:
- Go to your website
- Navigate to Information Center page (usually
)/information - Look for your article in the appropriate category section
- Click to open and verify it displays correctly
URL Structure:
- Information Center:
yoursite.com/information - Individual Article:
yoursite.com/docs/[your-slug]
Article Examples by Category
Example 1: Orders & Payments
Category: Orders & Payments
Title: How to Process a Full Refund
Description: Learn how to issue a complete refund for a customer order. Includes step-by-step instructions and troubleshooting for common issues.
Difficulty: Beginner level
Read Time: 5 minutes
Slug: process-full-refund
Published: ✅ Yes
Example 2: Products & Inventory
Category: Products & Inventory
Title: Adding Product Variants (Size, Color, Style)
Description: Create product variants to offer multiple options like sizes, colors, or styles. Manage inventory and pricing for each variant.
Difficulty: Intermediate level
Read Time: 7 minutes
Slug: product-variants-guide
Published: ✅ Yes
Example 3: Customers & Loyalty
Category: Customers & Loyalty
Title: Setting Up Your First Loyalty Program
Description: Create a loyalty program to reward repeat customers. Configure points, rewards, and redemption rules.
Difficulty: Beginner level
Read Time: 6 minutes
Slug: create-loyalty-program
Published: ✅ Yes
Example 4: Staff & Permissions
Category: Staff & Permissions
Title: Understanding User Roles and Permissions
Description: Learn about different user roles (Admin, Manager, Cashier) and what permissions each role has. Configure custom roles for your team.
Difficulty: Intermediate level
Read Time: 8 minutes
Slug: user-roles-permissions
Published: ✅ Yes
Example 5: Reports & Analytics
Category: Reports & Analytics
Title: Generating Monthly Sales Reports
Description: Create detailed sales reports for any date range. Export data to Excel or PDF format for analysis and record-keeping.
Difficulty: Beginner level
Read Time: 4 minutes
Slug: monthly-sales-reports
Published: ✅ Yes
Example 6: Billing & Account
Category: Billing & Account
Title: Upgrading Your Subscription Plan
Description: Upgrade to a higher tier plan for more features and capacity. Understand pricing changes and billing cycles.
Difficulty: Beginner level
Read Time: 3 minutes
Slug: upgrade-subscription
Published: ✅ Yes
Best Practices for Writing Help Articles
Know Your Audience
- Write for users who need help
- Don't assume technical knowledge
- Explain acronyms and jargon
- Use examples from real scenarios
Be Comprehensive
- Cover the topic thoroughly
- Include prerequisites
- Add troubleshooting section
- Link to related articles
Use Visuals
- Screenshots show exact steps
- Annotate images with arrows
- Use diagrams for complex flows
- Include before/after examples
Keep Content Current
- Review articles regularly
- Update when features change
- Mark outdated articles as draft
- Archive or delete obsolete content
Organize Logically
- Group related articles
- Create a logical flow
- Start with basics, build to advanced
- Cross-link related content
Organizing Your Article Library
Coverage by Category
Ensure balanced coverage across all categories:
Orders & Payments:
- Creating orders
- Processing payments
- Refunds
- Order management
- Payment troubleshooting
Products & Inventory:
- Adding products
- Managing inventory
- Product variants
- Pricing rules
- Import/export
Customers & Loyalty:
- Customer accounts
- Loyalty programs
- Customer groups
- Purchase history
- Marketing
Staff & Permissions:
- User management
- Roles and permissions
- Staff training
- Security settings
- Access control
Reports & Analytics:
- Sales reports
- Inventory reports
- Customer reports
- Financial reports
- Analytics dashboard
Billing & Account:
- Subscription management
- Billing information
- Account settings
- Plan features
- Support contact
Article Difficulty Distribution
Aim for a healthy mix:
- 60-70% Beginner - Most users need basic help
- 20-30% Intermediate - Power users and advanced features
- 5-10% Advanced - Technical users and integrations
Managing Your Articles
Editing Existing Articles
- Go to Articles in the sidebar
- Click on the article you want to edit
- Make your changes
- Click Publish to save
Tip: Articles auto-save as drafts while you work.
Unpublishing Articles
To temporarily hide an article:
- Open the article
- Uncheck Published
- Click Publish to save
The article disappears from the website but remains in Studio for future use.
Deleting Articles
To permanently remove an article:
- Open the article
- Click the three-dot menu (⋯) at the top
- Select Delete
- Confirm deletion
Warning: Deletion is permanent and cannot be undone.
Duplicating Articles
To create a similar article:
- Open the source article
- Click the three-dot menu (⋯)
- Select Duplicate
- Edit the new copy
- Change title, slug, and content
- Publish when ready
Troubleshooting
Article Not Appearing on Website
Check:
- Is Published checkbox checked?
- Did you click Publish button?
- Is the category correct?
- Try refreshing the website
- Clear browser cache
Slug Already Exists Error
Solution:
- Click Generate again
- Manually edit slug to be unique
- Add year or version:
process-refund-2025 - Use more specific slug:
process-customer-refund
Can't Save Article
Check:
- All required fields filled (marked with *)
- Category selected
- Title has content
- Description has content
- Slug is generated
- Read time is set
Formatting Not Showing
Try:
- Use the toolbar buttons
- Don't copy-paste from Word (use plain text)
- Clear formatting and reapply
- Use full-screen editor
Quick Reference
| Action | Steps |
|---|---|
| Create Article | Articles → + icon → Fill fields |
| Set Category | Select from dropdown (required) |
| Generate Slug | Write title → Click "Generate" |
| Format Text | Select text → Use toolbar buttons |
| Full-Screen Edit | Click expand icon (⛶) |
| Save as Draft | Uncheck "Published" → Publish |
| Publish Article | Check "Published" → Click Publish |
| Edit Article | Articles → Click article → Edit → Publish |
| Unpublish | Uncheck "Published" → Publish |
Content Planning Template
Use this template to plan articles before writing:
ARTICLE IDEA

Category: [Select category]
Target Audience: [Who needs this?]
Problem Solved: [What issue does this address?]

Title: [Descriptive, action-oriented title]
Description: [1-3 sentence summary]

Outline:
1. Introduction - Why this matters
2. Prerequisites - What you need first
3. Step 1: [First step]
4. Step 2: [Second step]
5. Step 3: [Third step]
6. Troubleshooting - Common issues
7. Next Steps - Related articles

Difficulty: [Beginner/Intermediate/Advanced]
Estimated Length: [Word count]
Read Time: [Minutes]

Related Articles:
- [Link to related article 1]
- [Link to related article 2]
Next Steps
- Review Creating Landing Pages for promotional pages
- Check Creating Content Pages for information pages
- See Content Creator Guide for general guidance
Need More Help?
- Review existing articles for examples
- Contact your technical team
- Visit Sanity Documentation
Last Updated: 2025-11-18 Tutorial Version: 1.0