

How to Create a Landing Page in Sanity Studio
This step-by-step tutorial will guide you through creating a new landing page (home page) in Sanity Studio for the Popay POS website.
What you'll create:
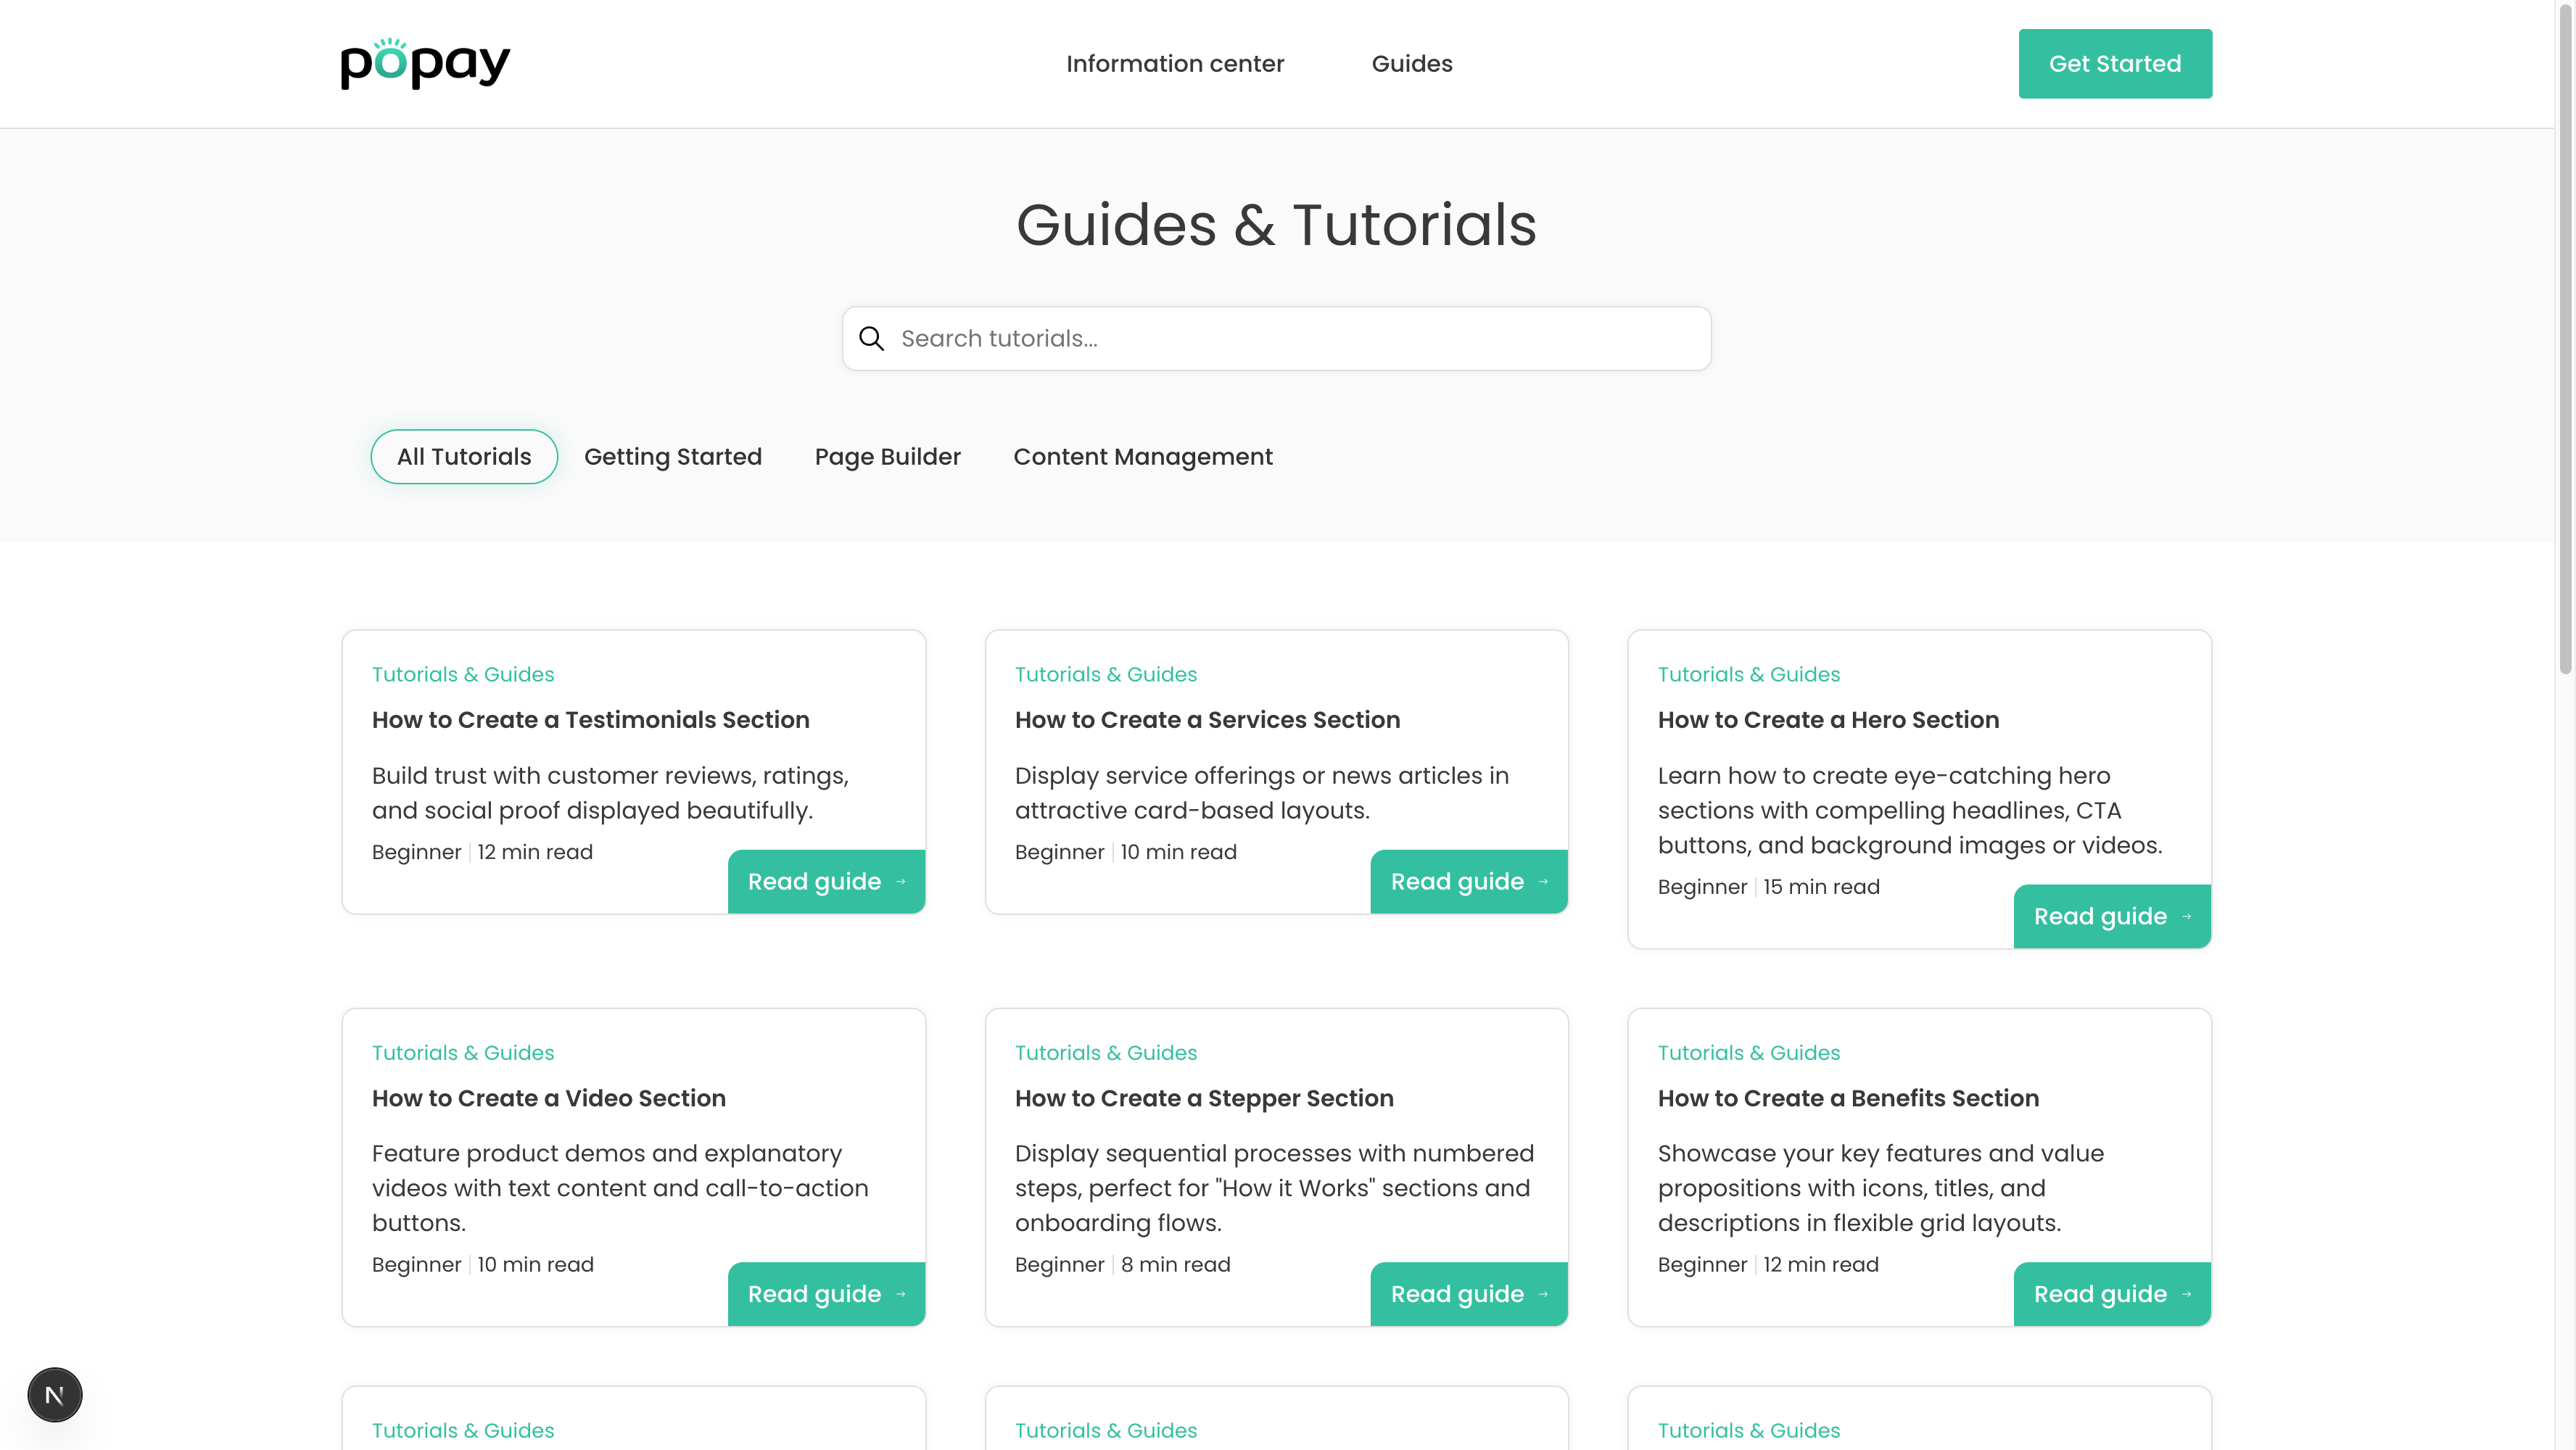 An example landing page with multiple sections as it appears on your website
Prerequisites
- Access to Sanity Studio at https://popay.sanity.studio/
- Logged in with proper credentials
Step 1: Navigate to Pages Section
- Open Sanity Studio in your browser
- In the left sidebar, click on Pages
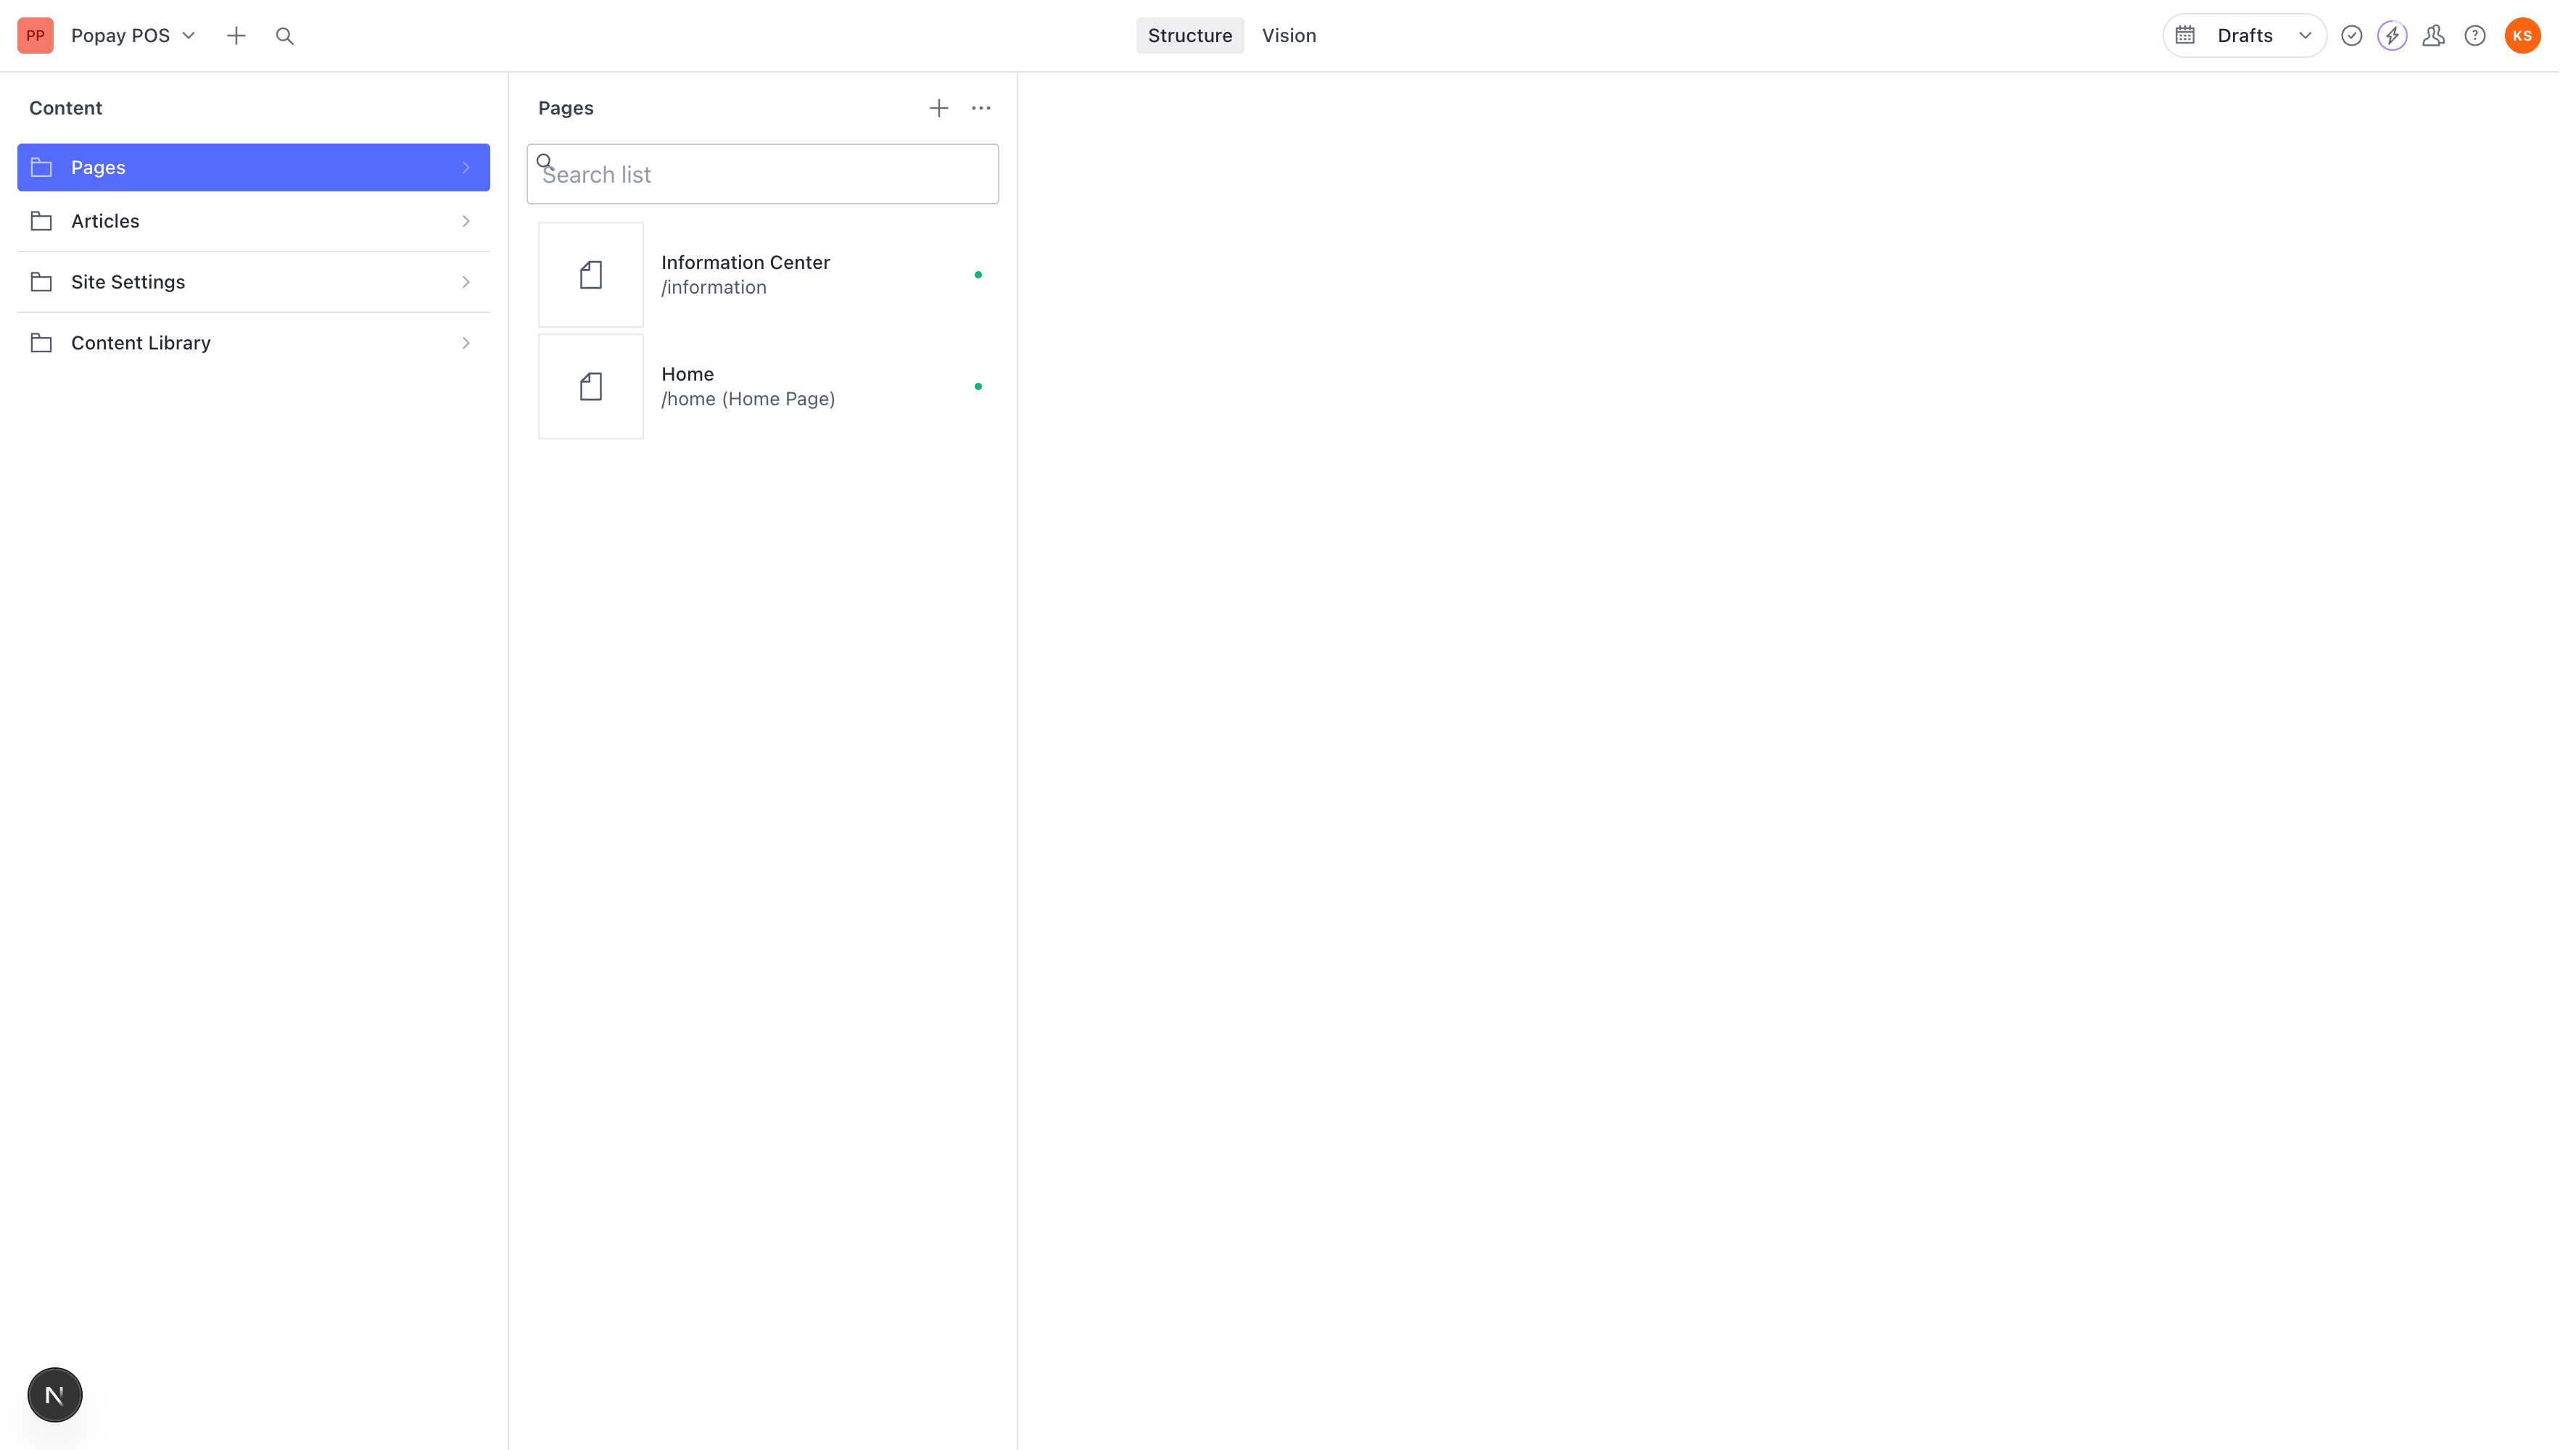
You'll see a list of all existing pages in your website.
Step 2: Create a New Page
- Click the + icon next to "Pages" at the top of the middle panel
- A menu will appear with three options:
- Page - Regular content page
- Home Page - Landing page template
- Content Page - Information/article page
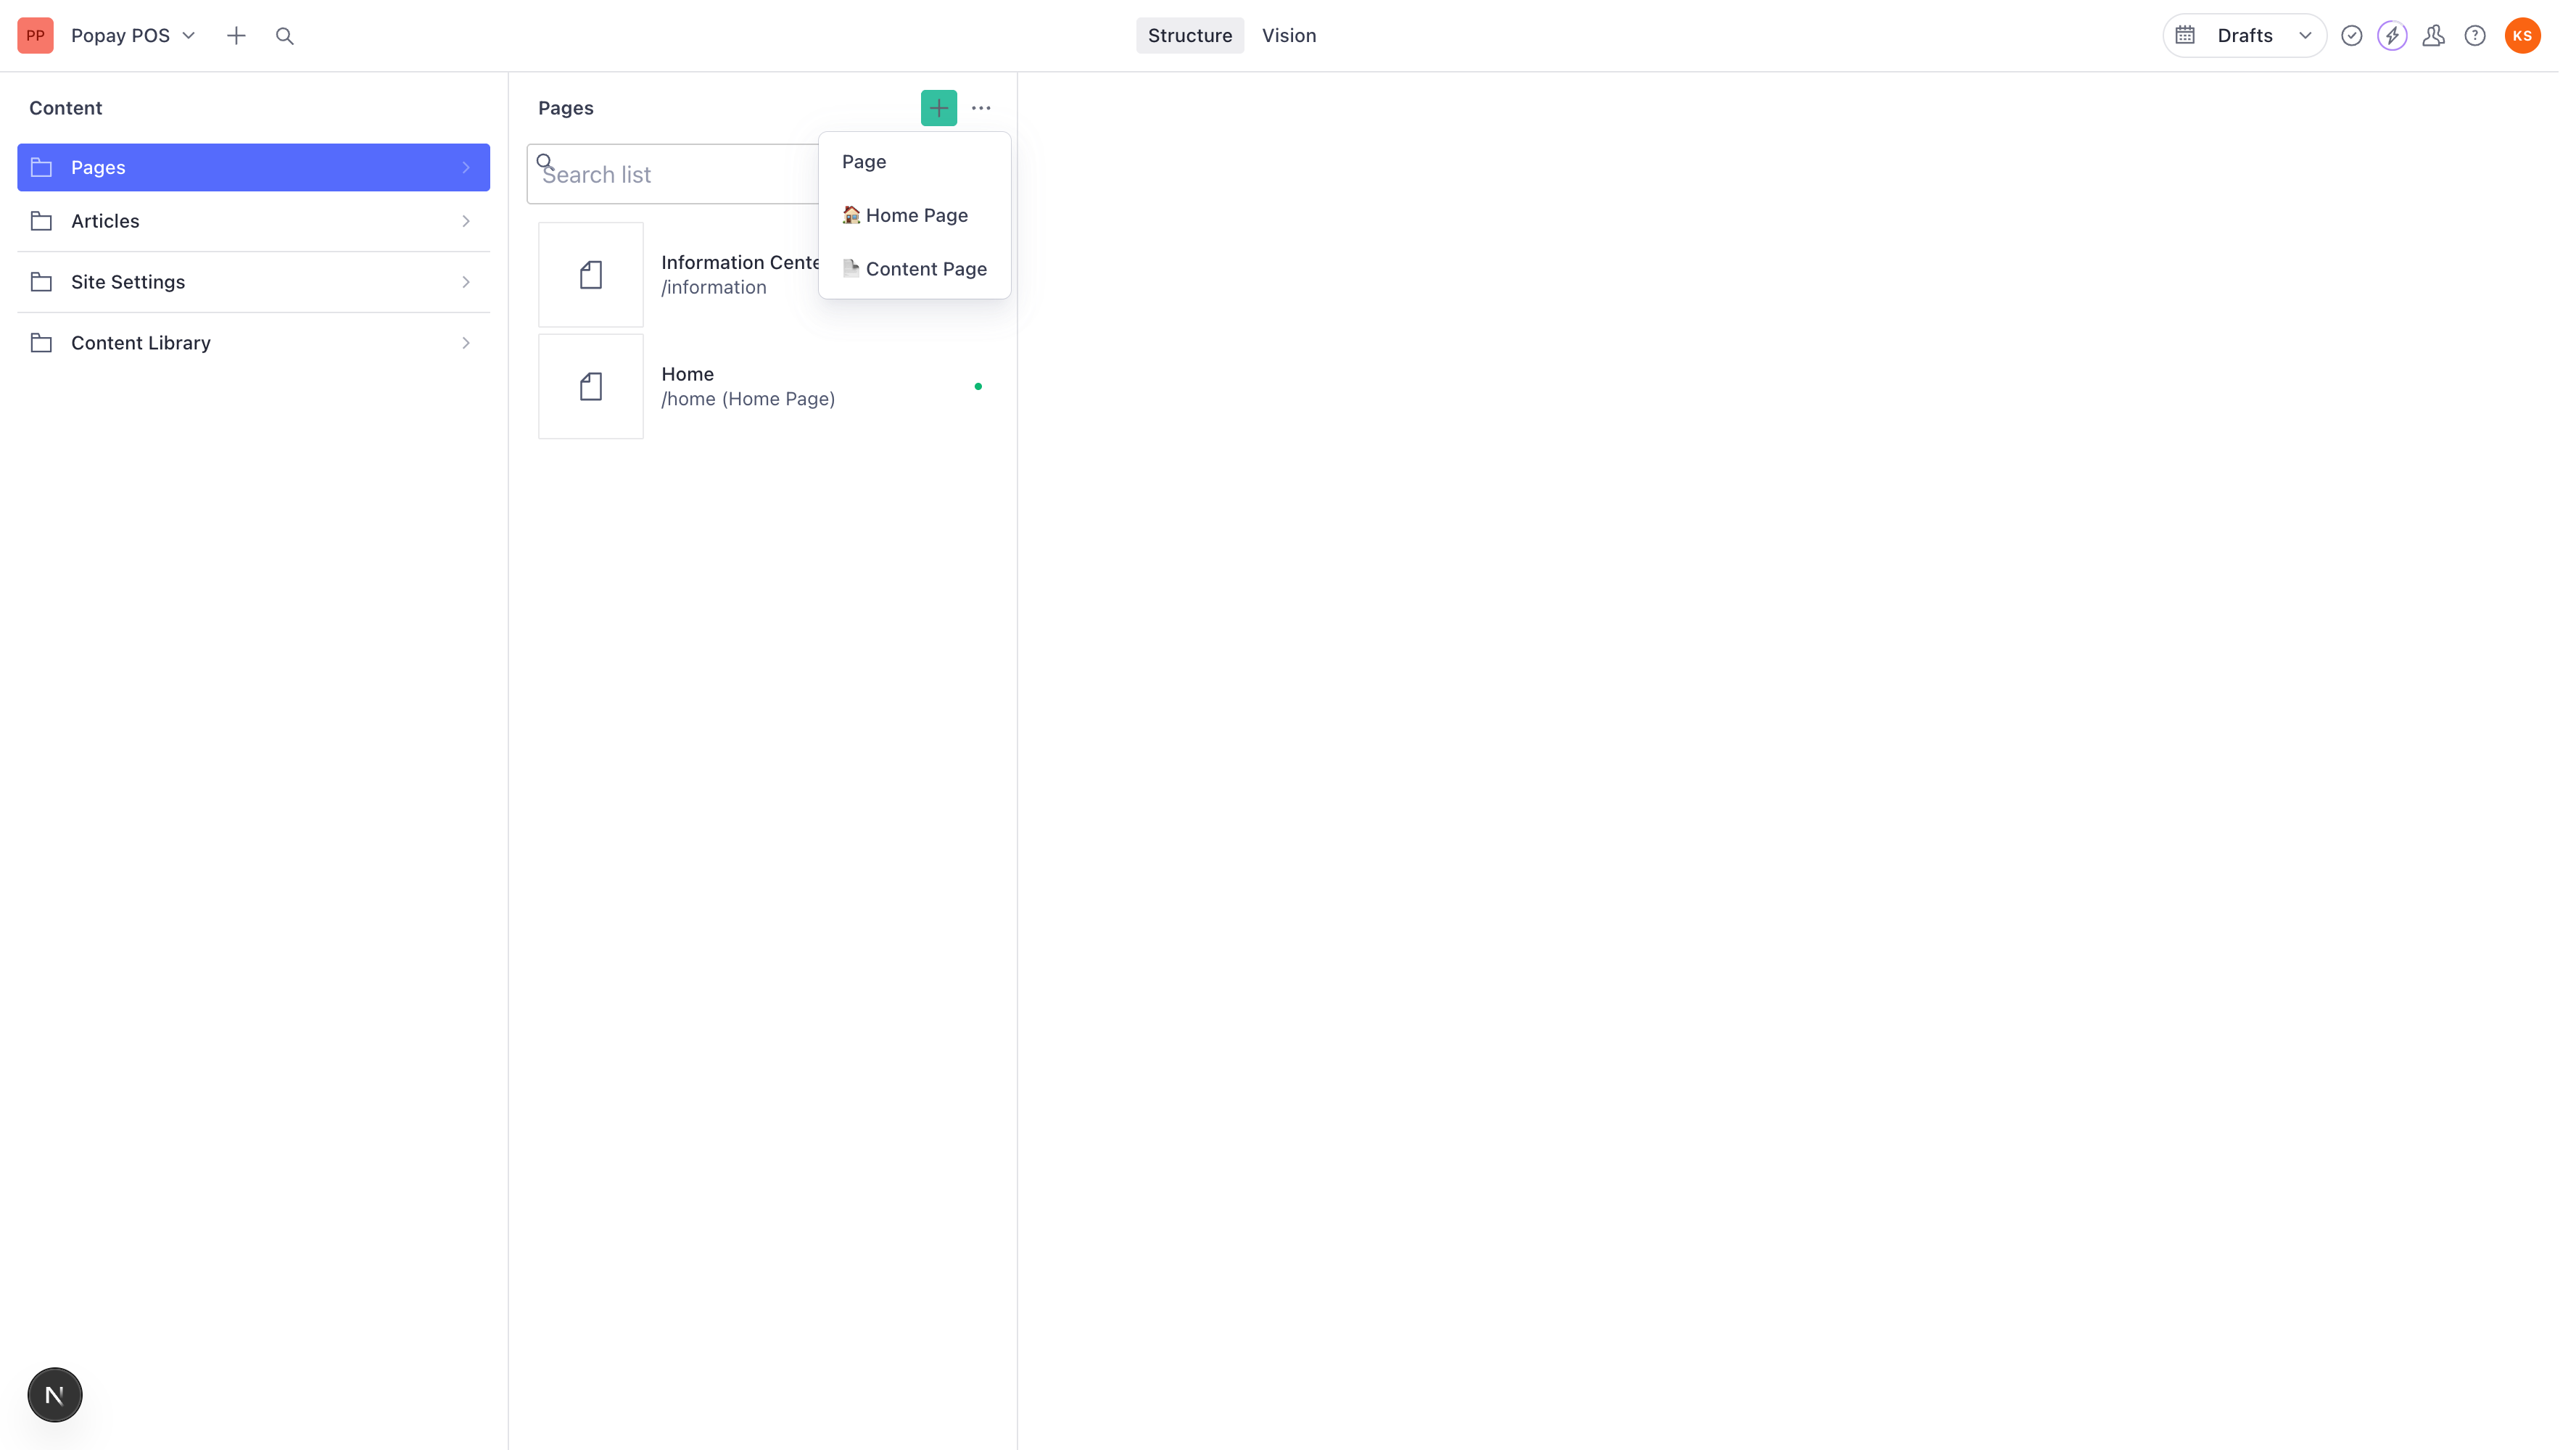
- Click on Home Page since we're creating a landing page
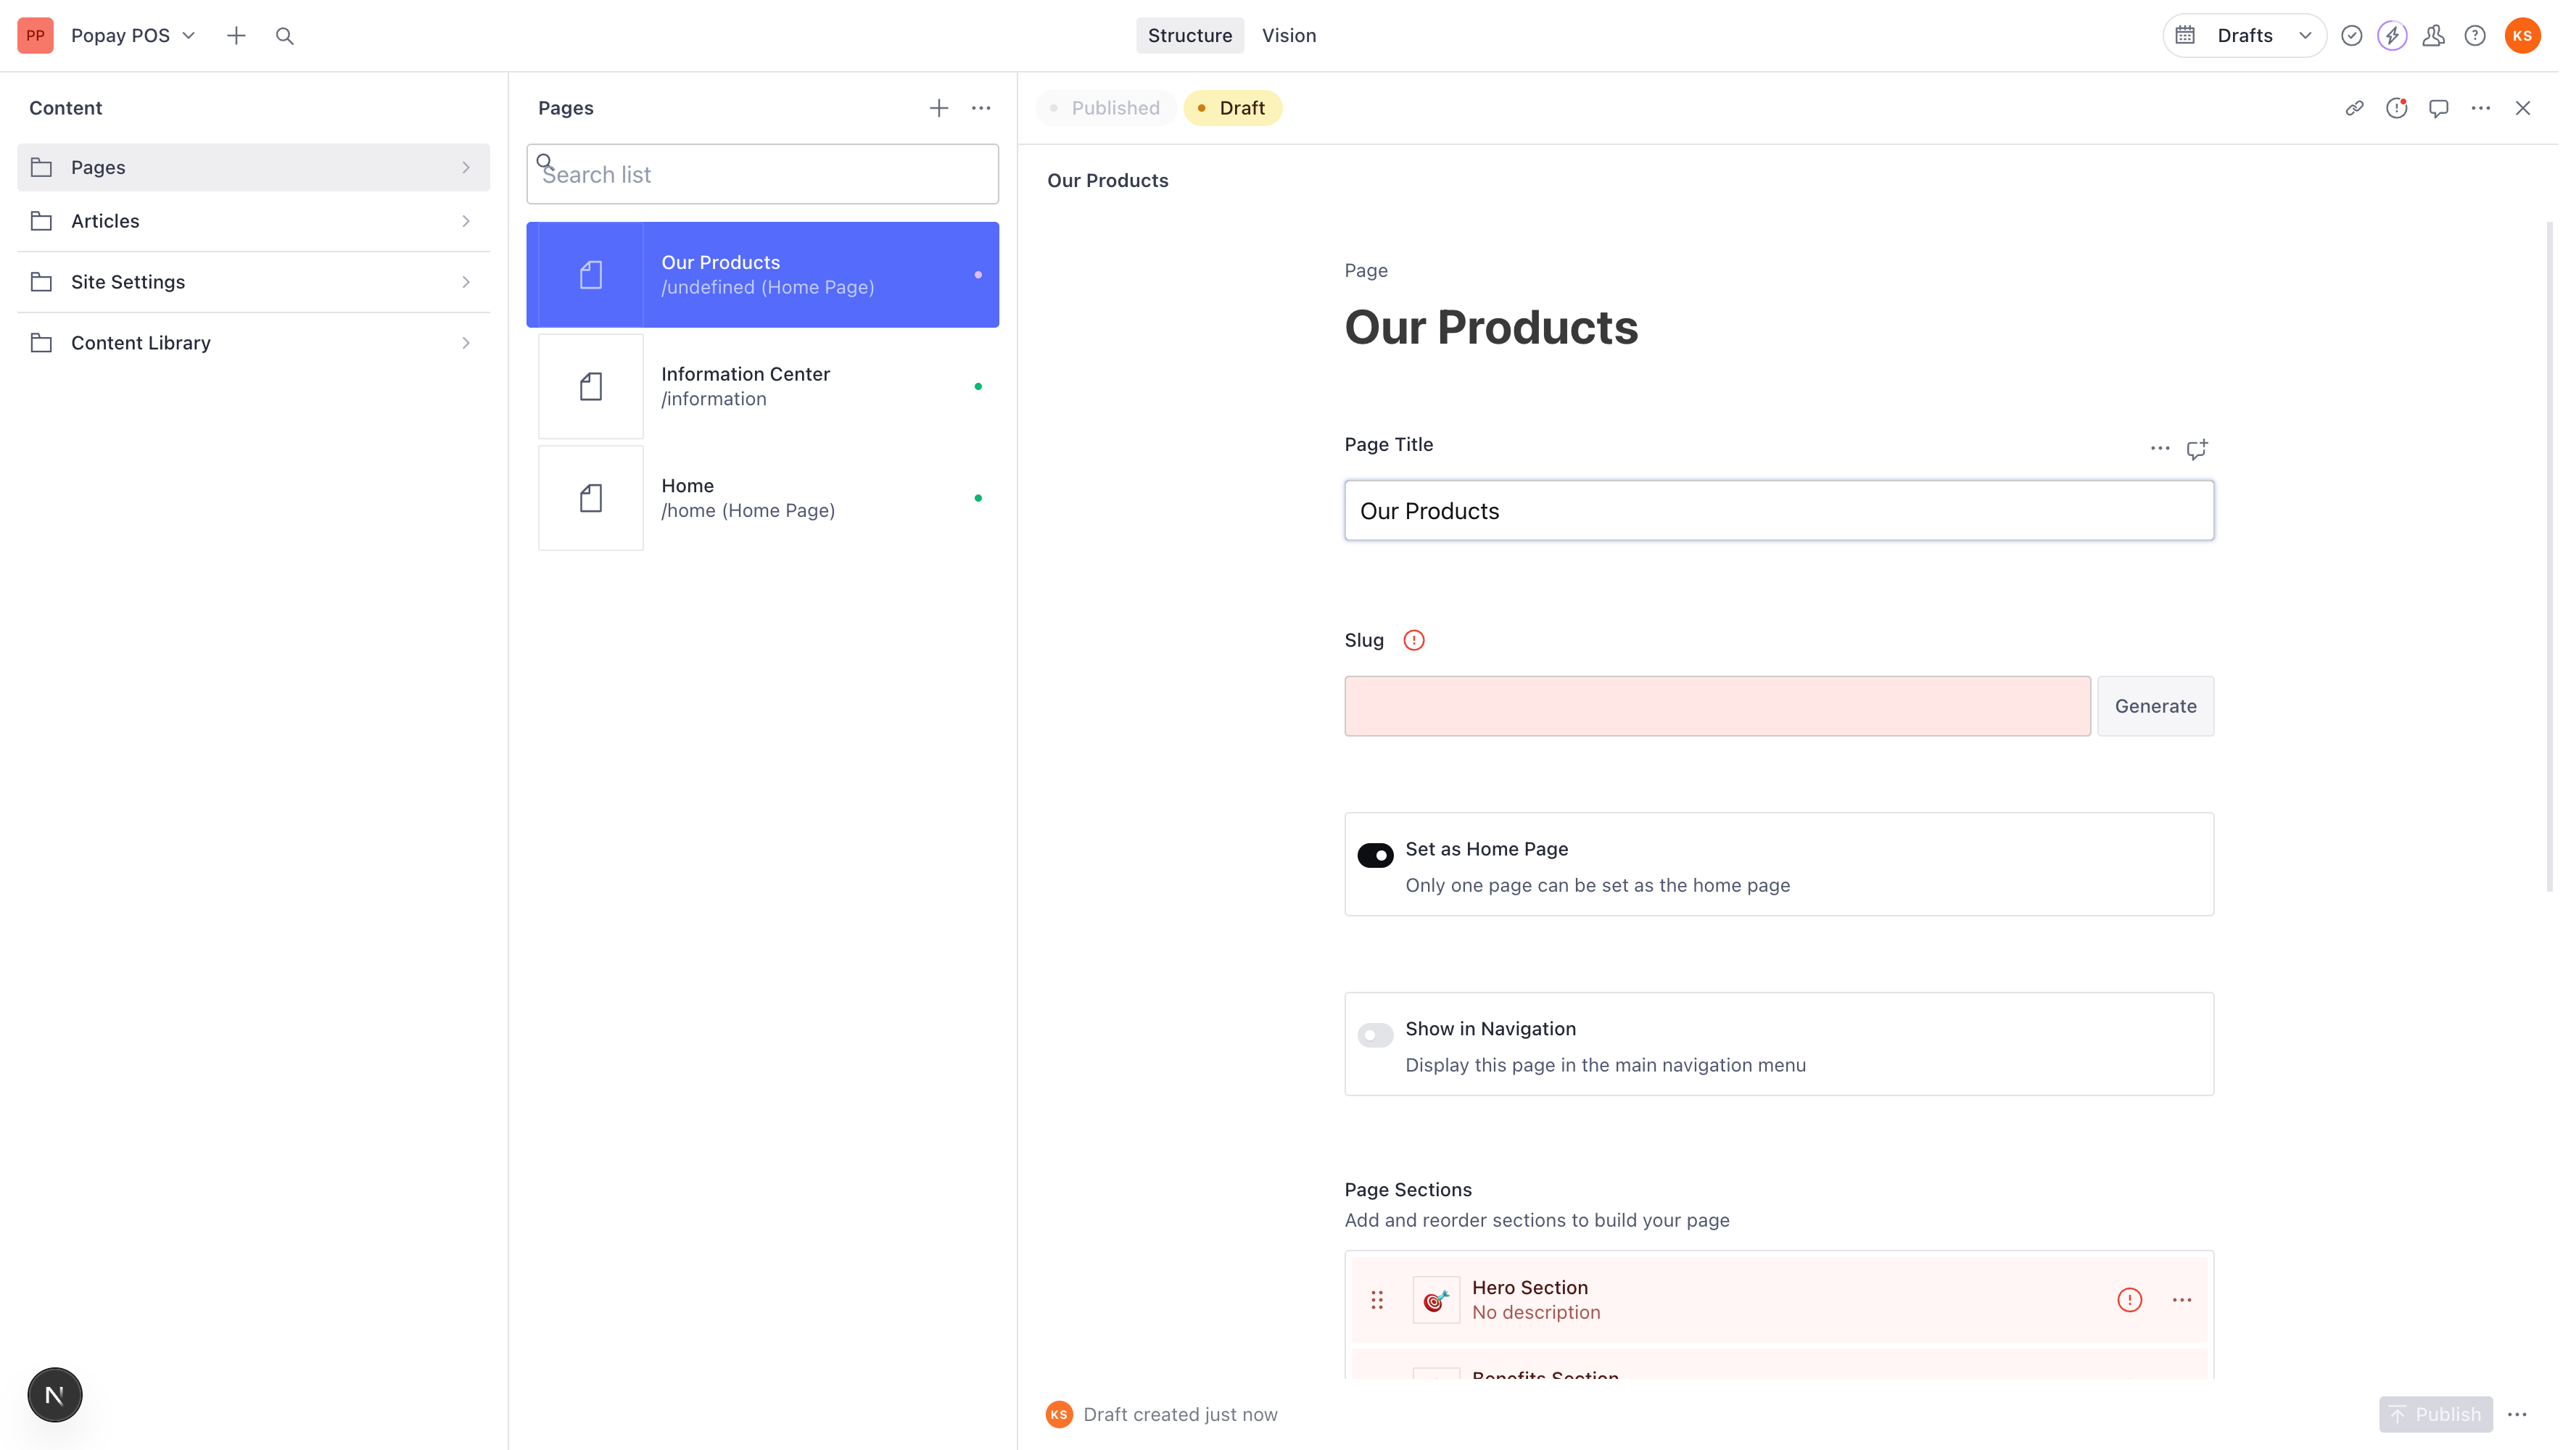
Step 3: Understanding the Blank Page Form
After clicking "Home Page", you'll see a blank form with several fields:
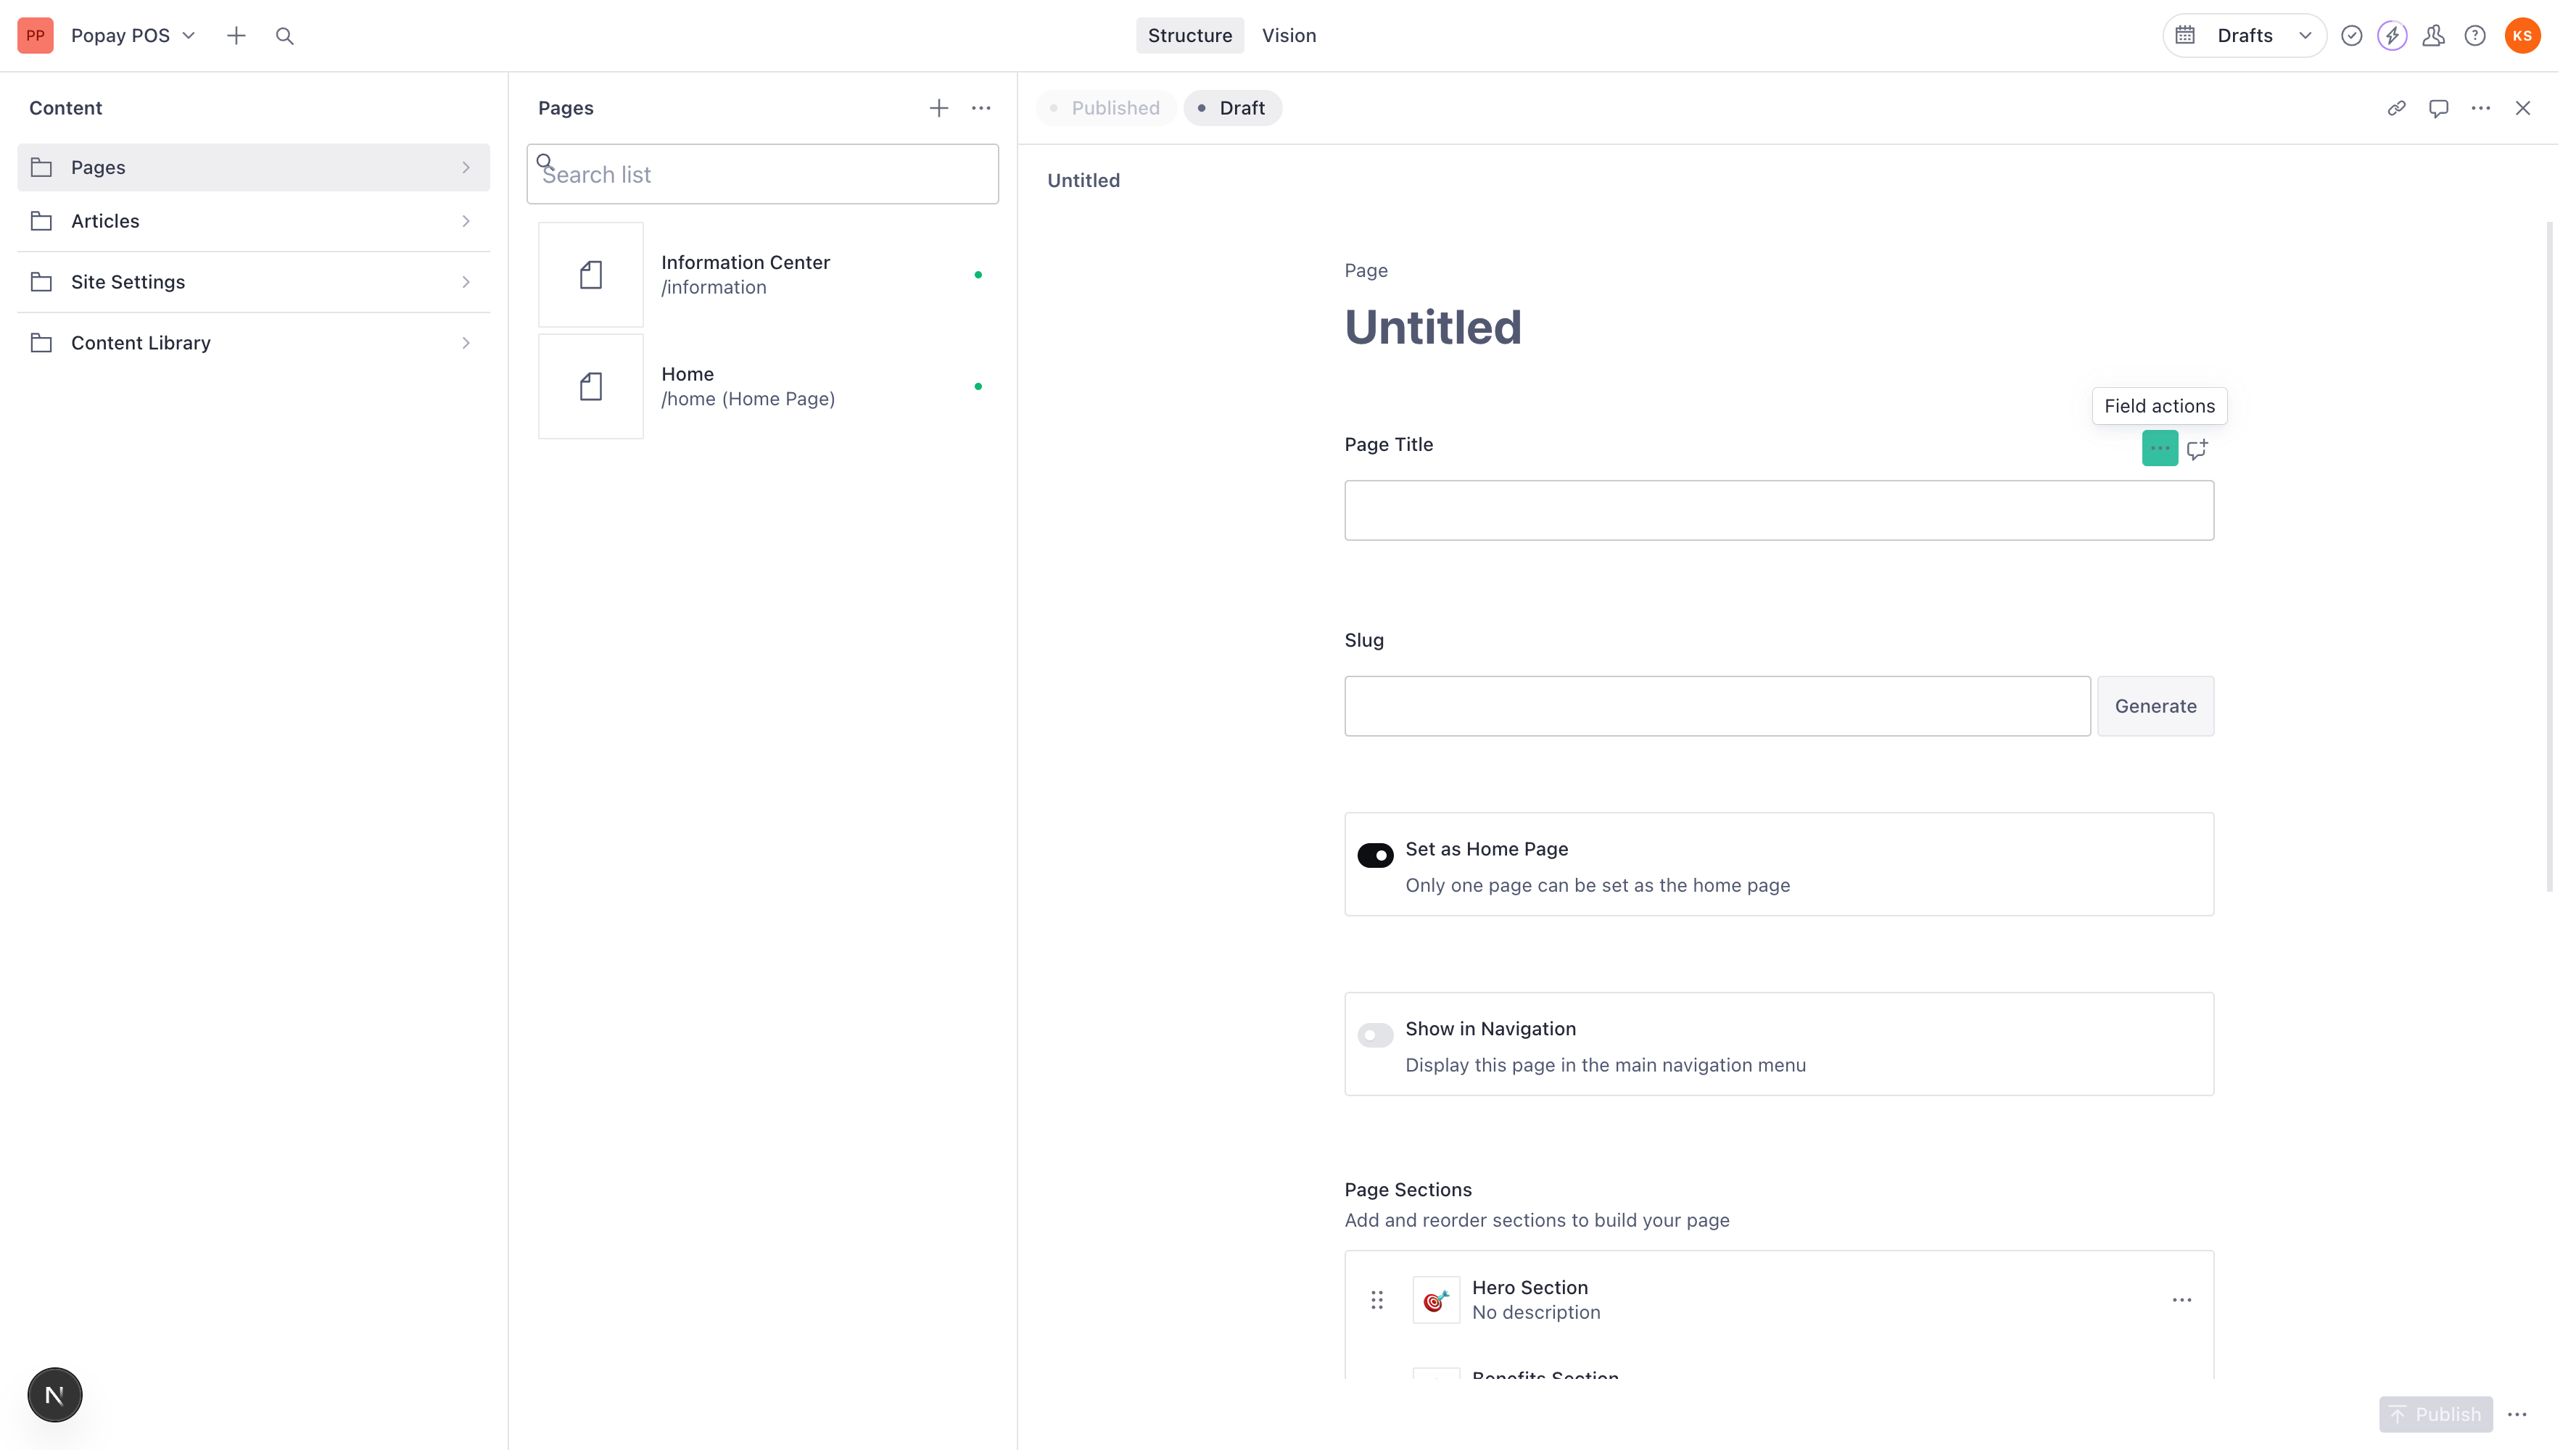
The form includes:
- Page Title - The main title of your page
- Slug - URL path for the page
- Set as Home Page - Checkbox to make this the homepage
- Show in Navigation - Display in main menu
- Navigation Label - Custom menu text
- Navigation Order - Menu position
- Page Sections - Content sections (Hero, Services, etc.)
- SEO Settings - Meta tags and SEO configuration
Step 4: Enter Page Title
- Click in the Page Title field
- Type your page title (e.g., "Our Products")
The title should be clear and descriptive of your landing page's purpose.
Step 5: Generate Page Slug
- After entering the title, click the Generate button next to the Slug field
- The system will automatically create a URL-friendly slug from your title
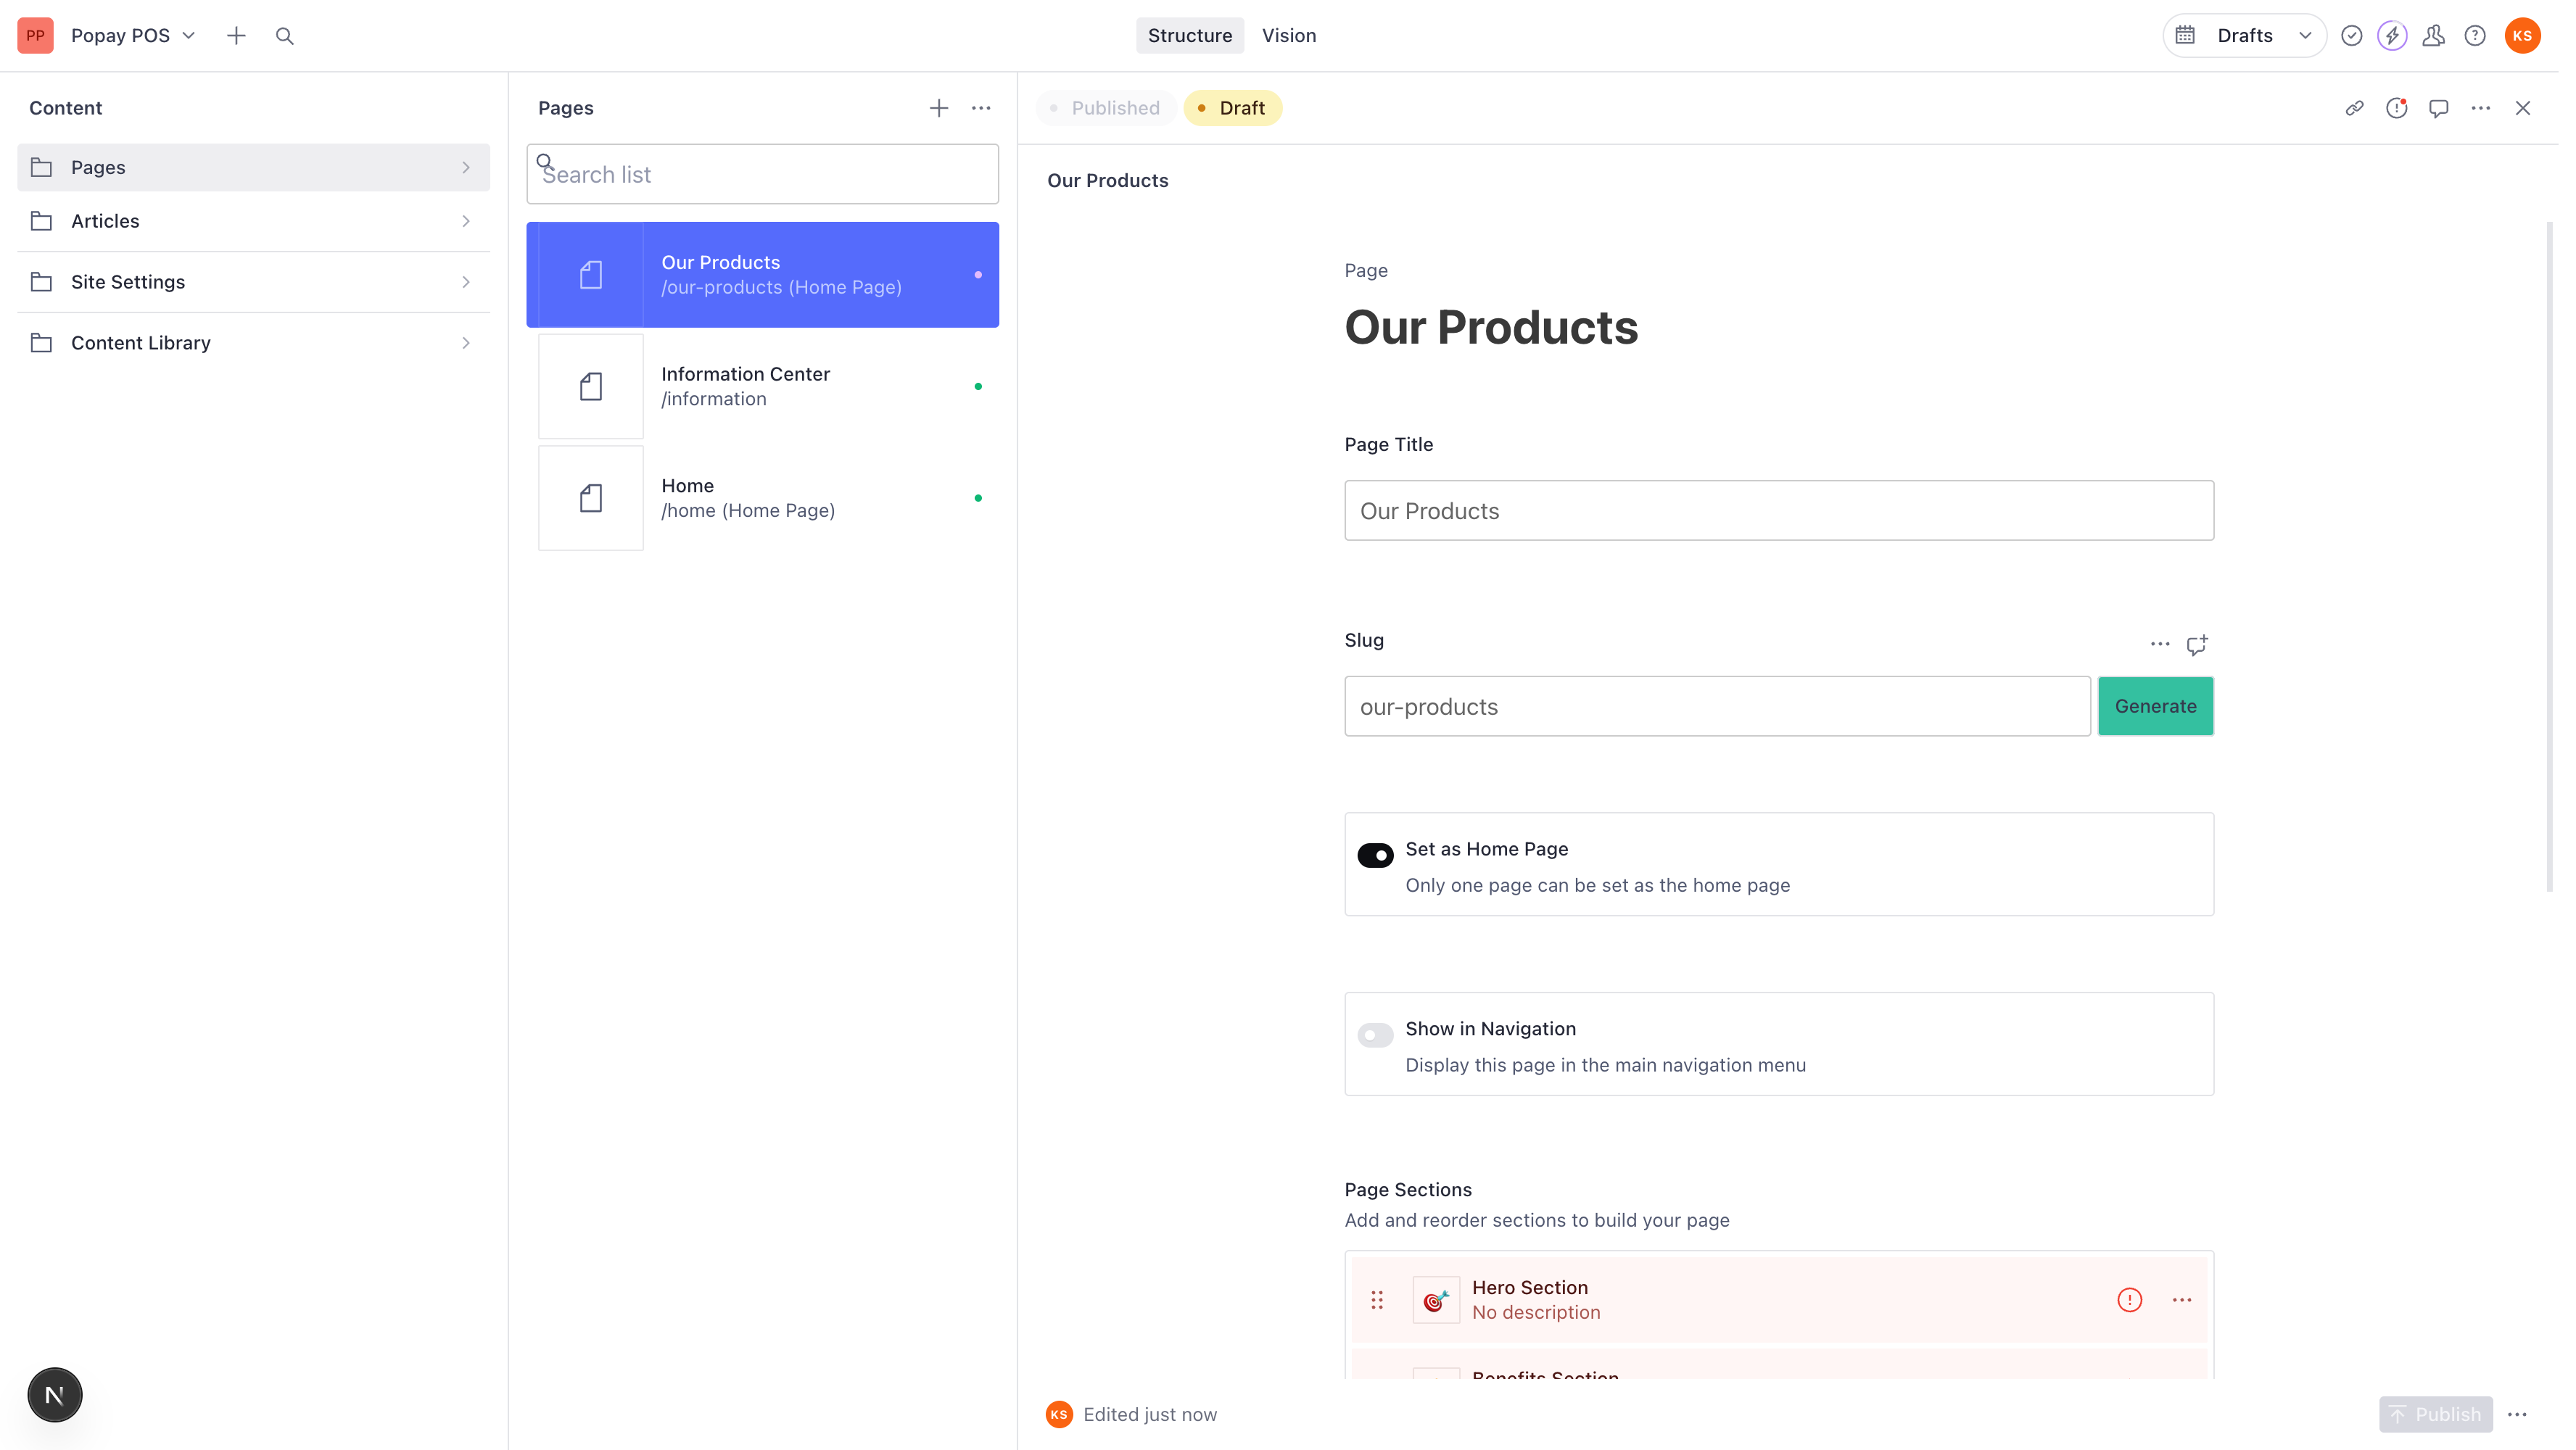
For example:
- Title: "Our Products" → Slug: "our-products"
- The page will be accessible at:
yoursite.com/our-products
Step 6: Configure Navigation Settings
Set as Home Page
- Check the Set as Home Page checkbox if you want this to be your main landing page
- Note: Only one page can be set as the home page at a time
Show in Navigation
- Check Show in Navigation to display this page in your main menu
- You can customize the Navigation Label if you want different text in the menu
- Set Navigation Order (lower numbers appear first)
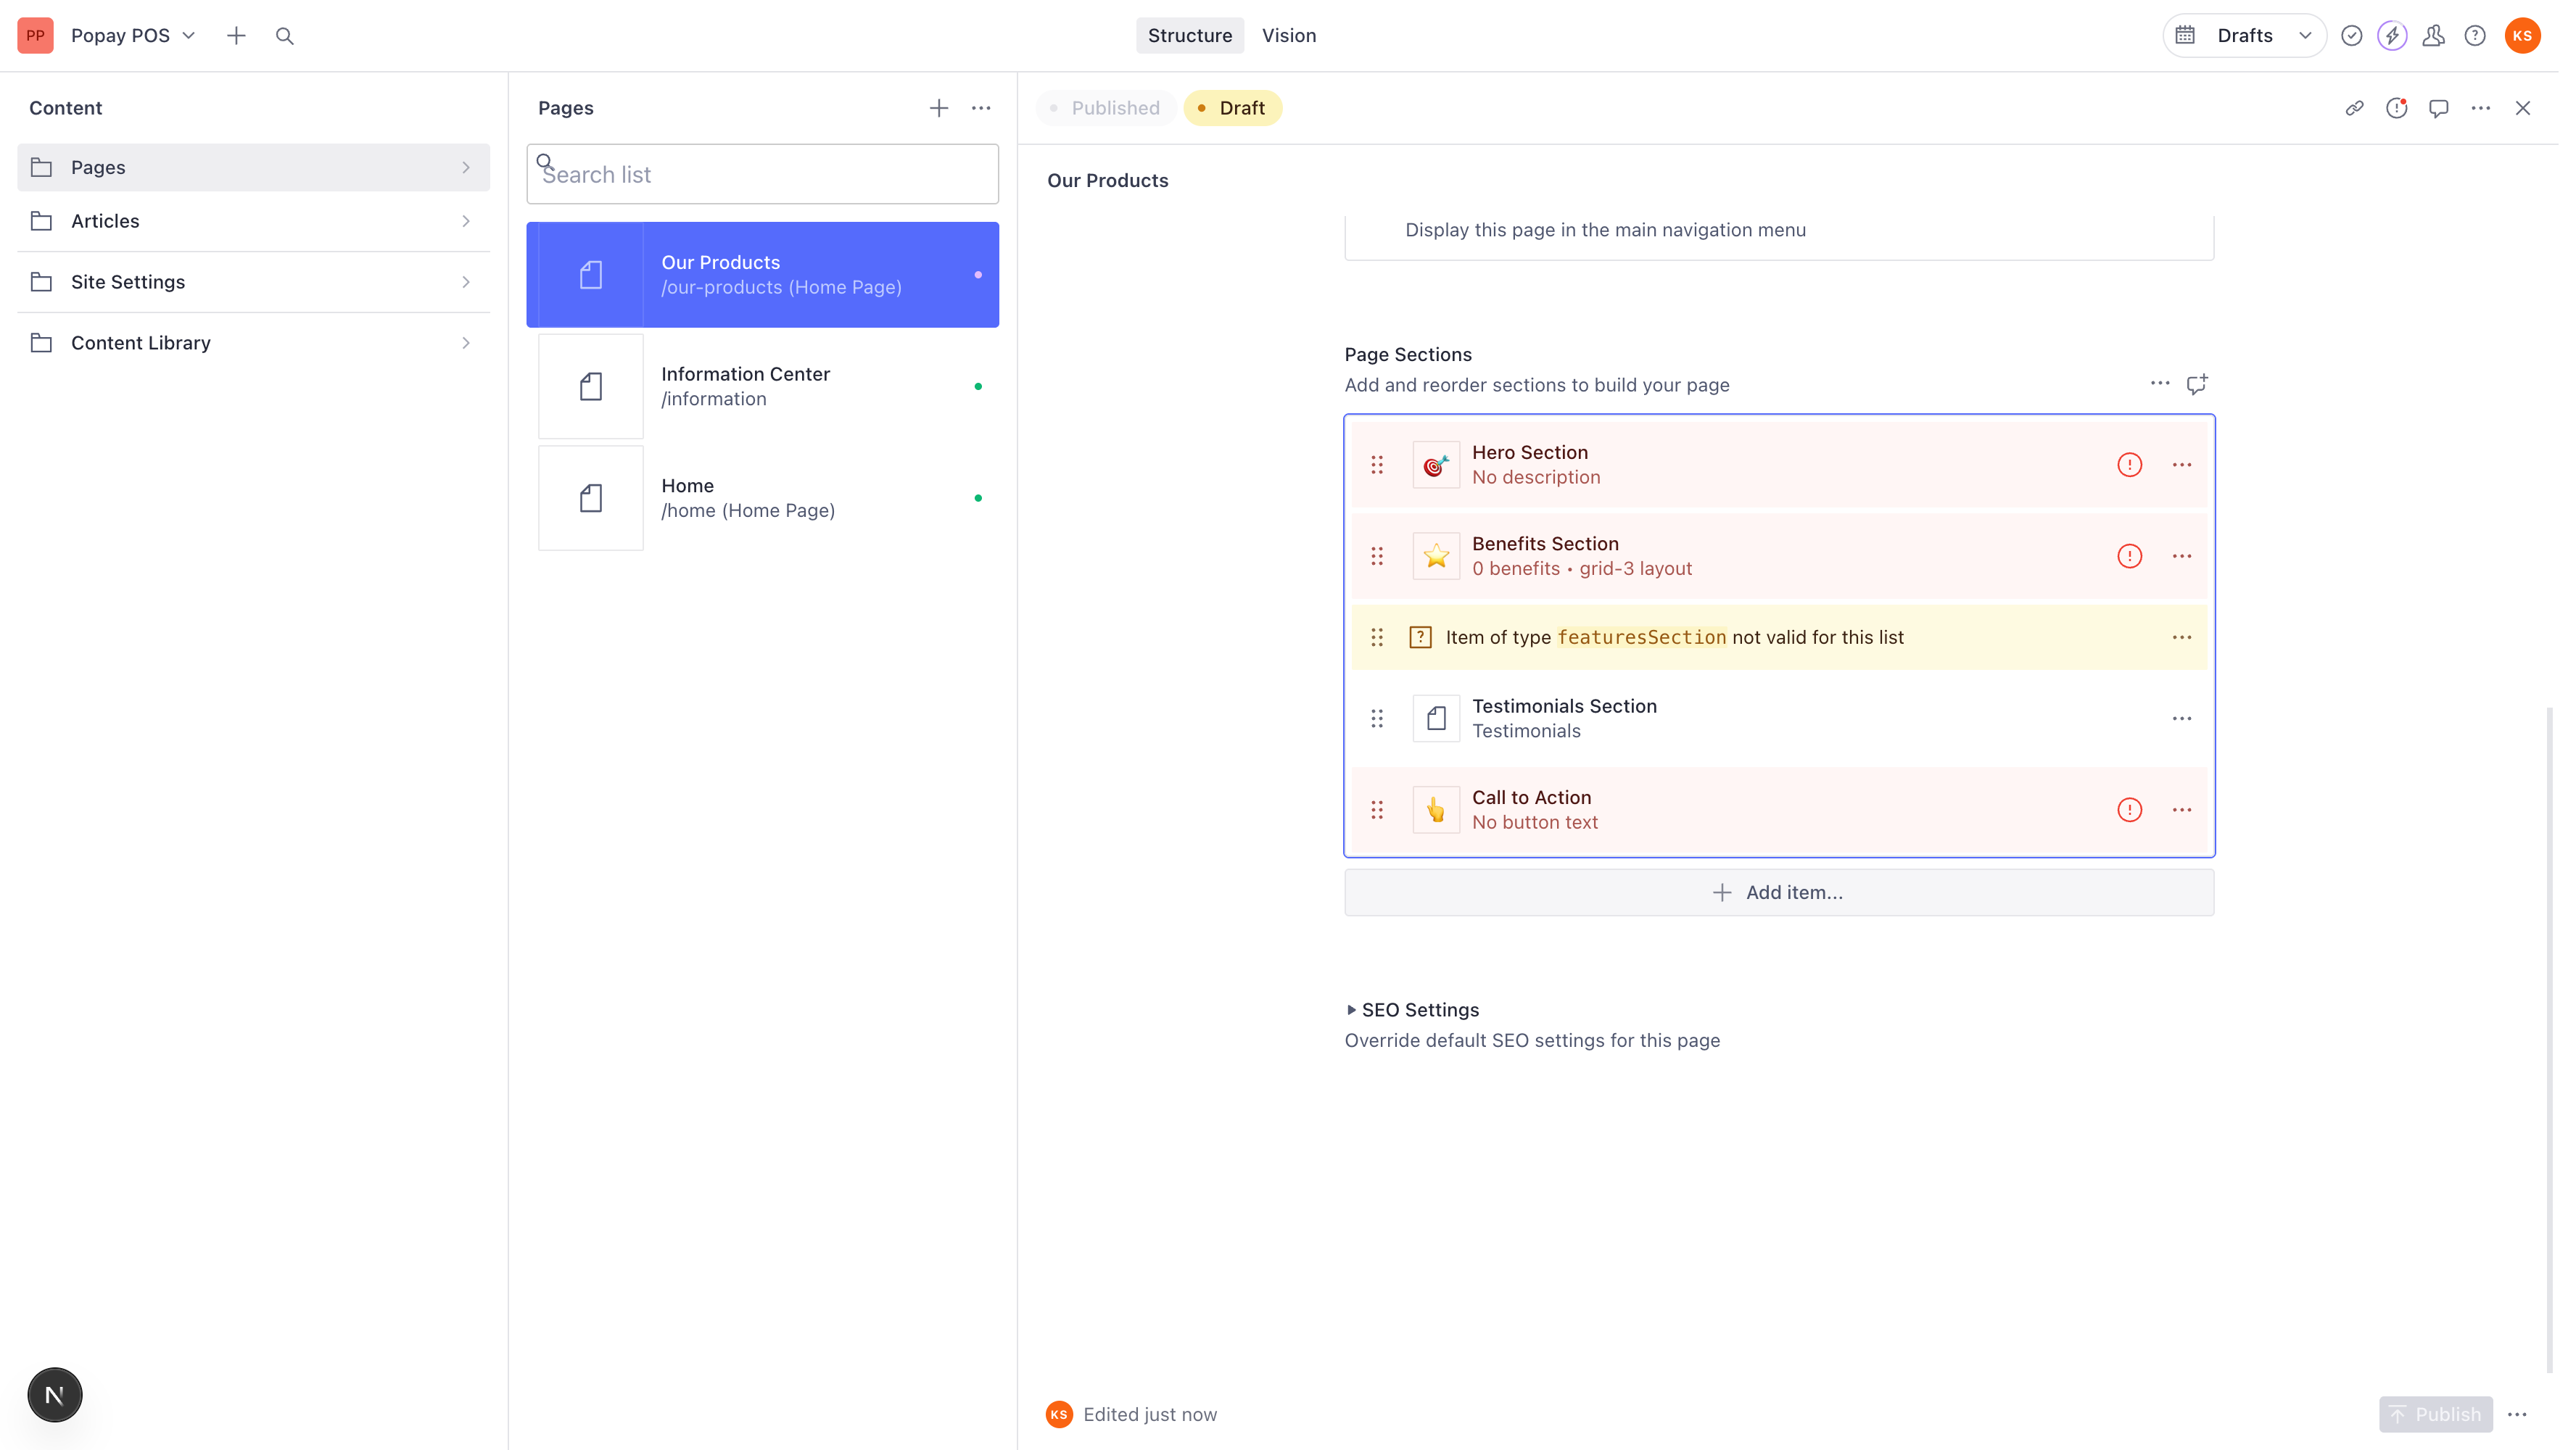
Step 7: Understanding Page Sections
Scroll down to the Page Sections area. This is where you build your landing page content using pre-built section components.
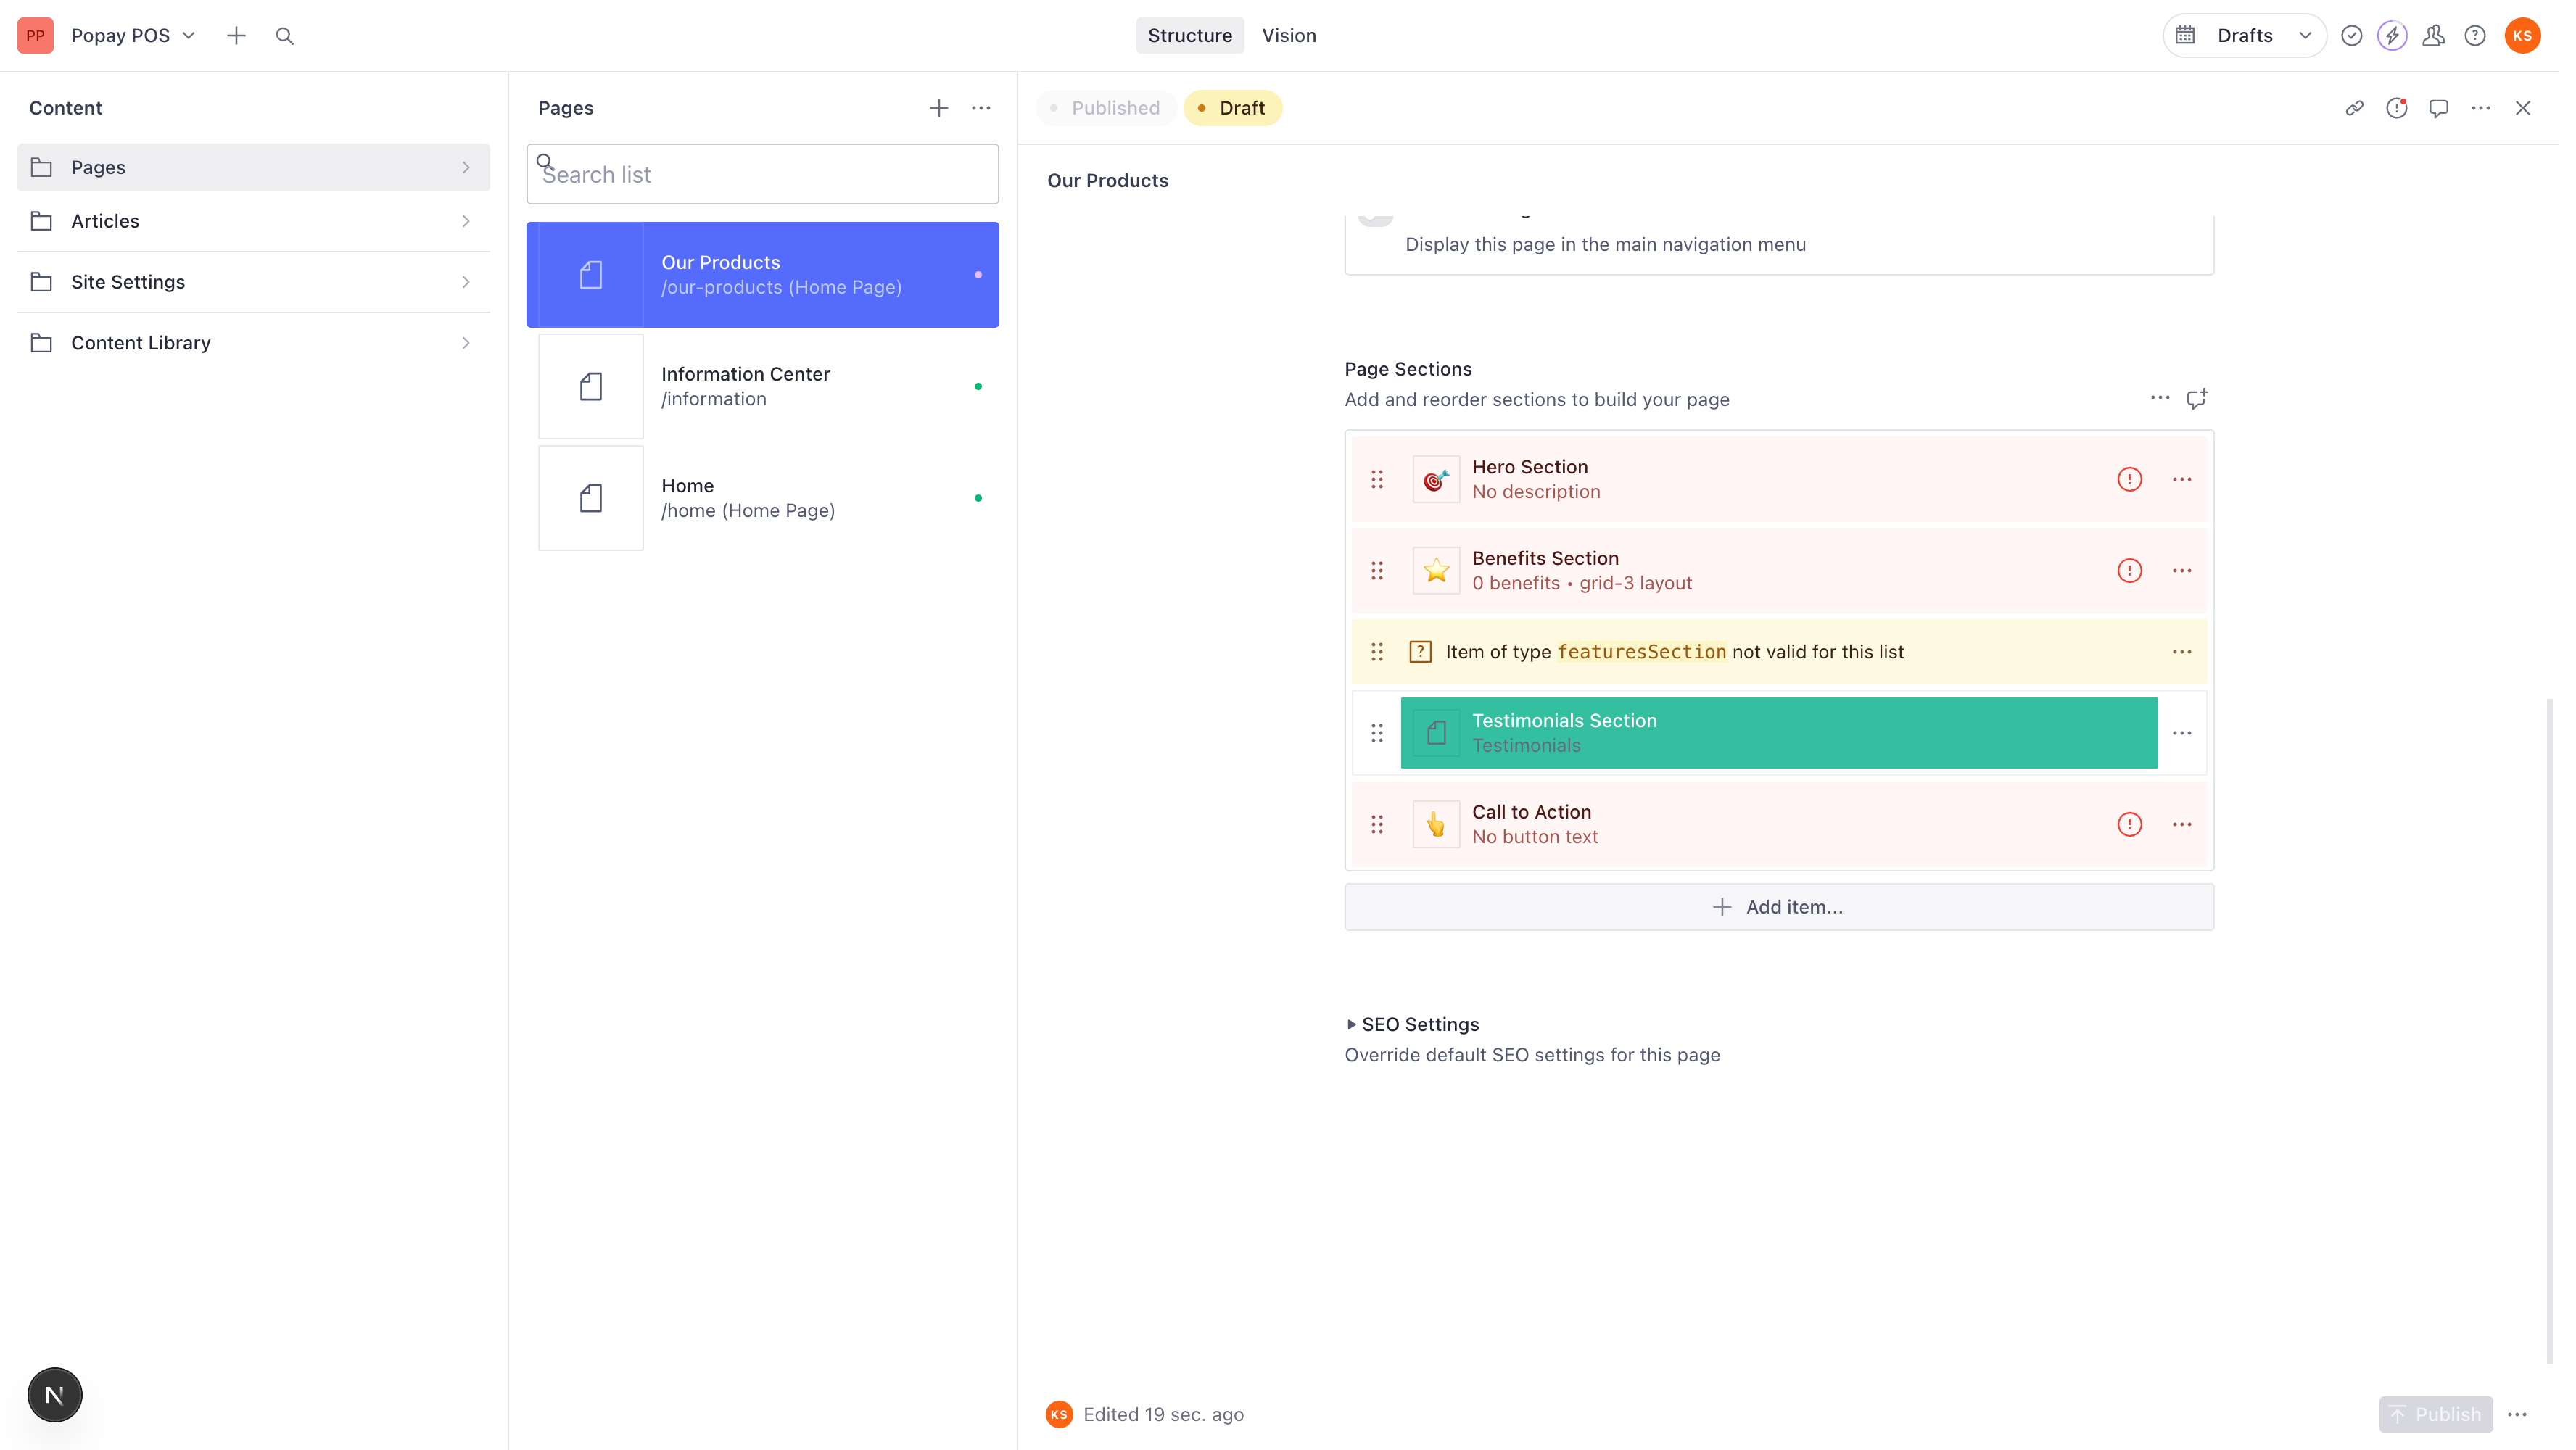
Your new page may already have some default sections:
- 🎯 Hero Section
- ⭐ Benefits Section
- Testimonials Section
- 👆 Call to Action
- And more...
You can:
- Click on any section to edit it
- Use the drag handles (⋮⋮) to reorder sections
- Delete sections you don't need
- Add new sections
Step 8: Adding New Sections
- Scroll to the bottom of the Page Sections area
- Click the Add item... button
- A modal will appear showing all available section types
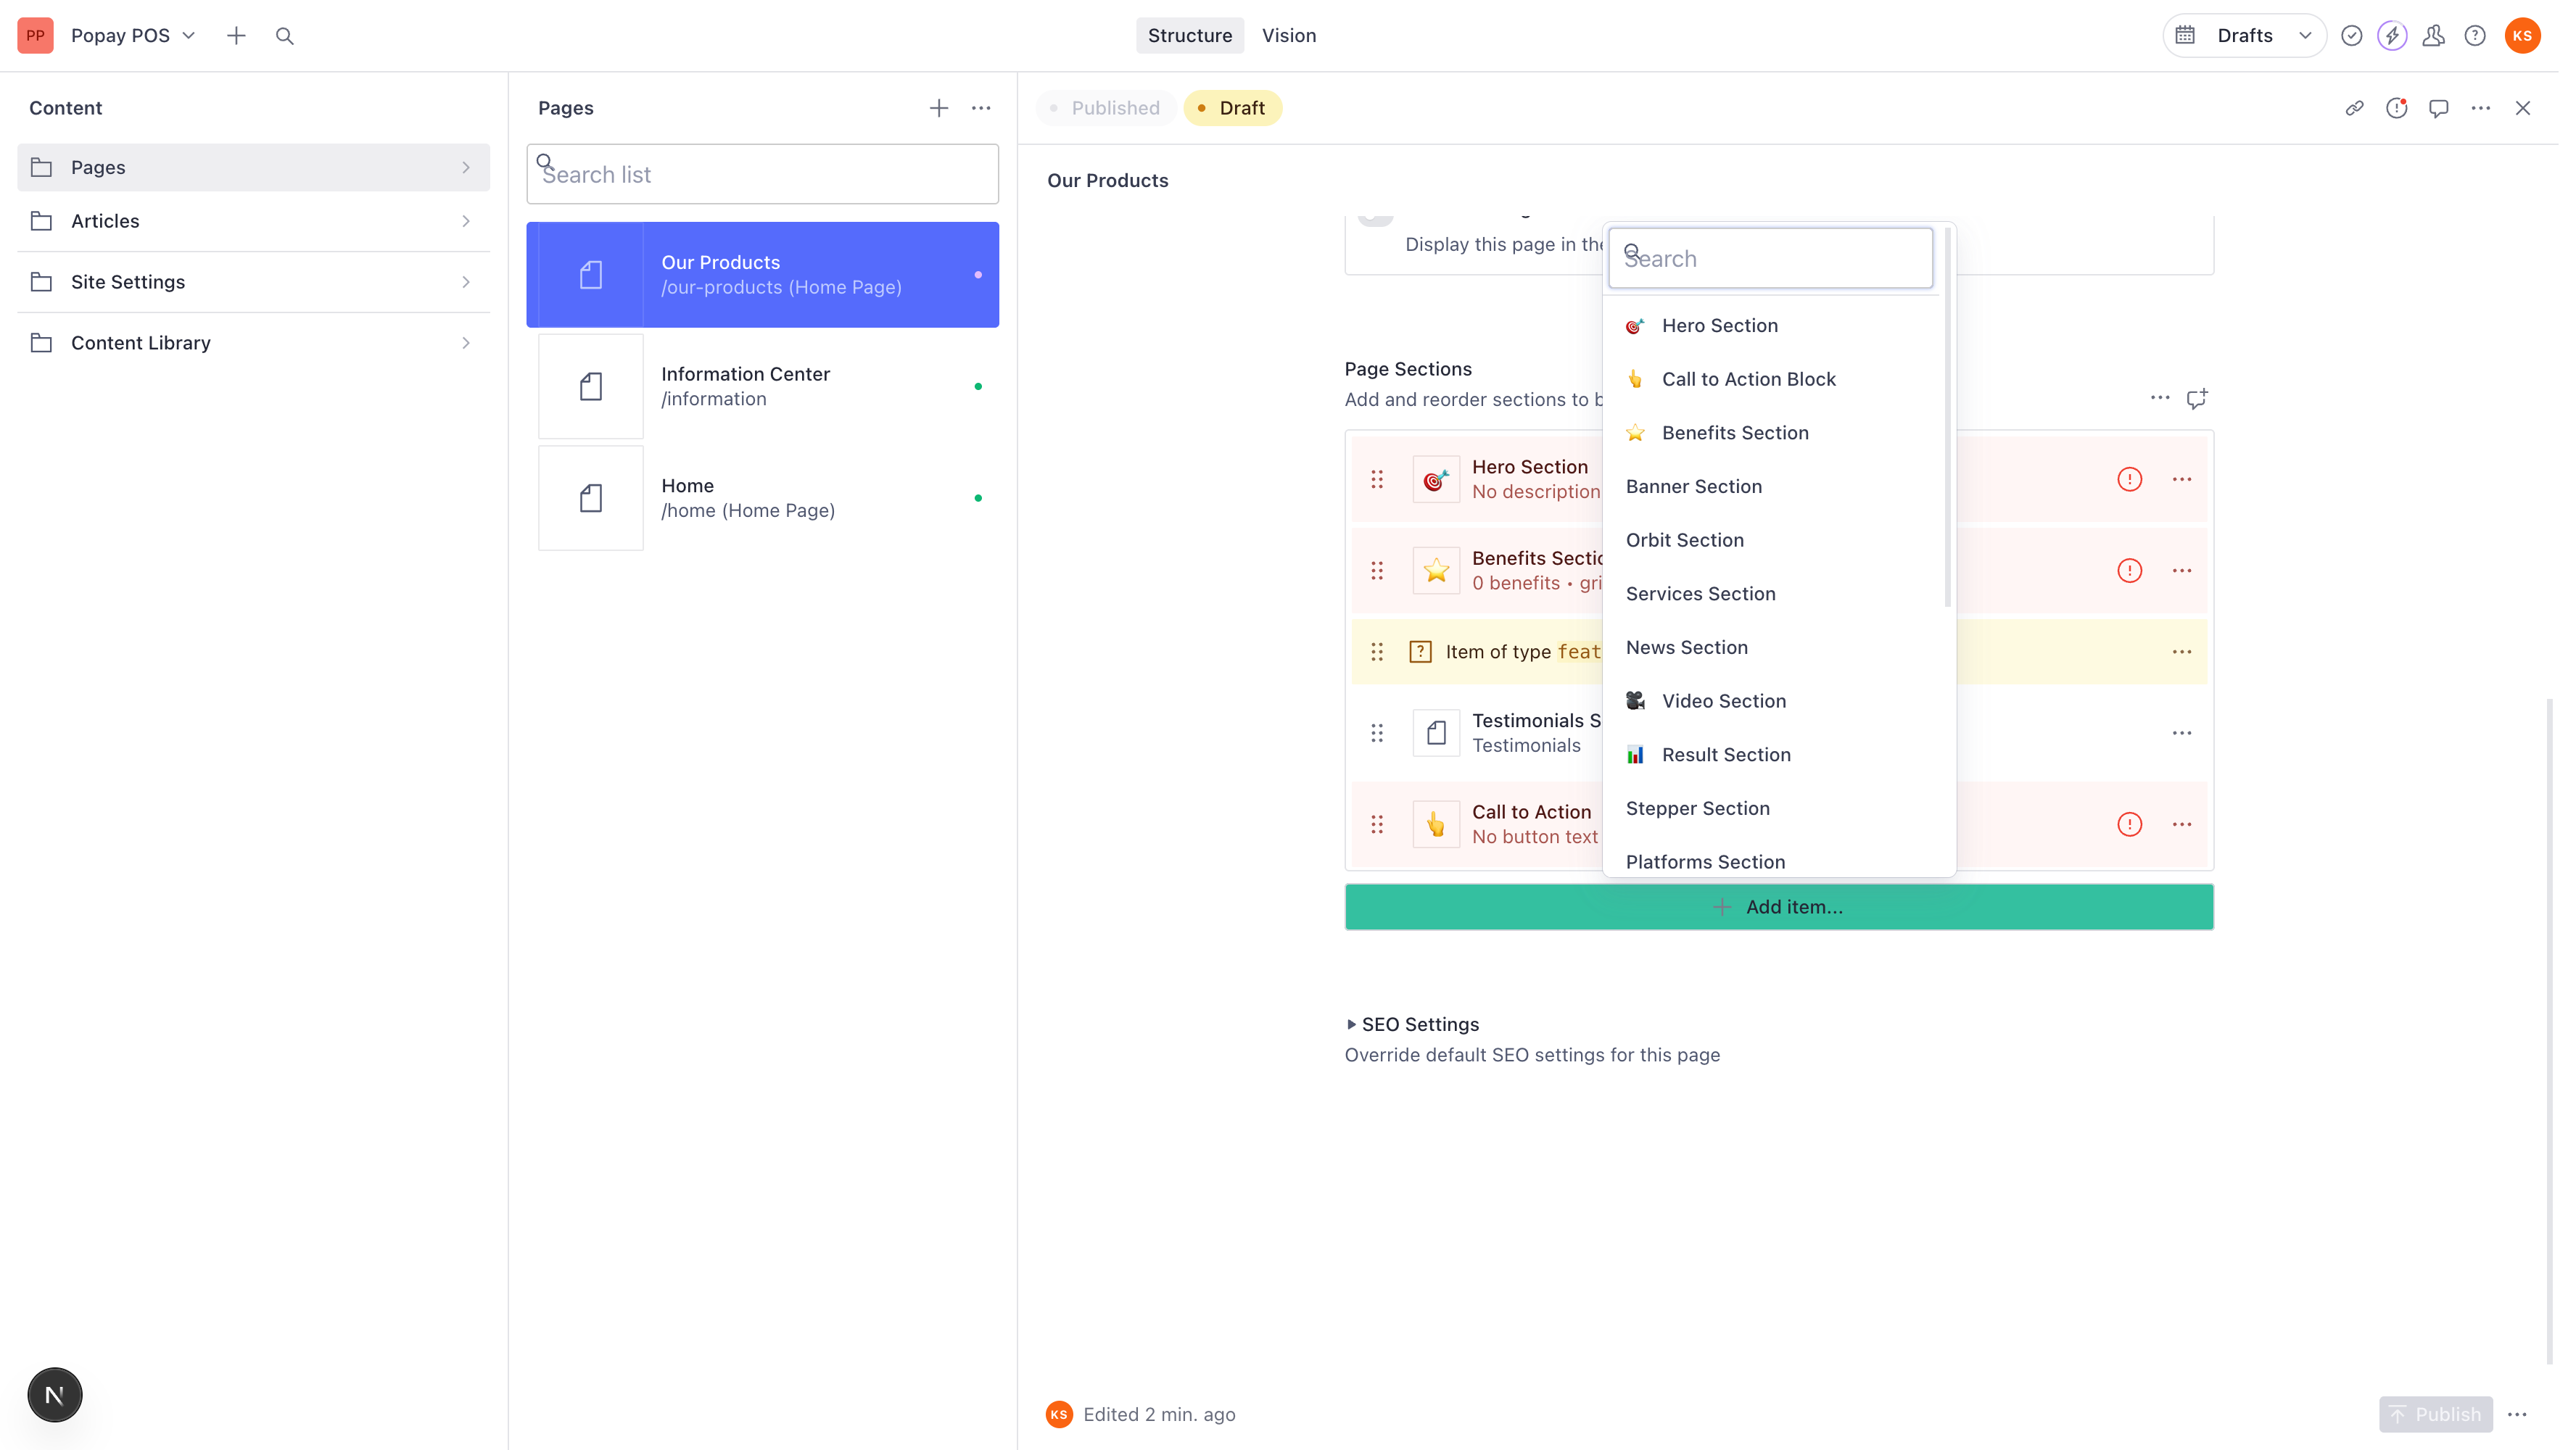
Available Section Types:
Content Sections:
- 🎯 Hero Section - Large banner with headline and CTA
- 👆 Call to Action Block - Prominent call-to-action button
- ⭐ Benefits Section - Grid of benefits/features
- Banner Section - Promotional banner
- Orbit Section - Animated orbit display
- Services Section - List of services offered
- News Section - Latest news/blog posts
- 🎥 Video Section - Embedded video content
- 📊 Result Section - Statistics and results
- Stepper Section - Step-by-step process
- Platforms Section - Platform integrations
- Pricing Section - Pricing tables
- Testimonials Section - Customer testimonials
- FAQ Section - Frequently asked questions
- Brands Section - Partner/client logos
Information Center Sections:
- Inner Header with Search - Page header with search
- Information Tabs Section - Tabbed content
- Information Center Section - Help center content
- Content with Sidebar Navigation - Content + sidebar
Step 9: Configuring a Section (Example: Services Section)
- From the Add Section modal, click on Services Section
- A dialog will open to configure the section
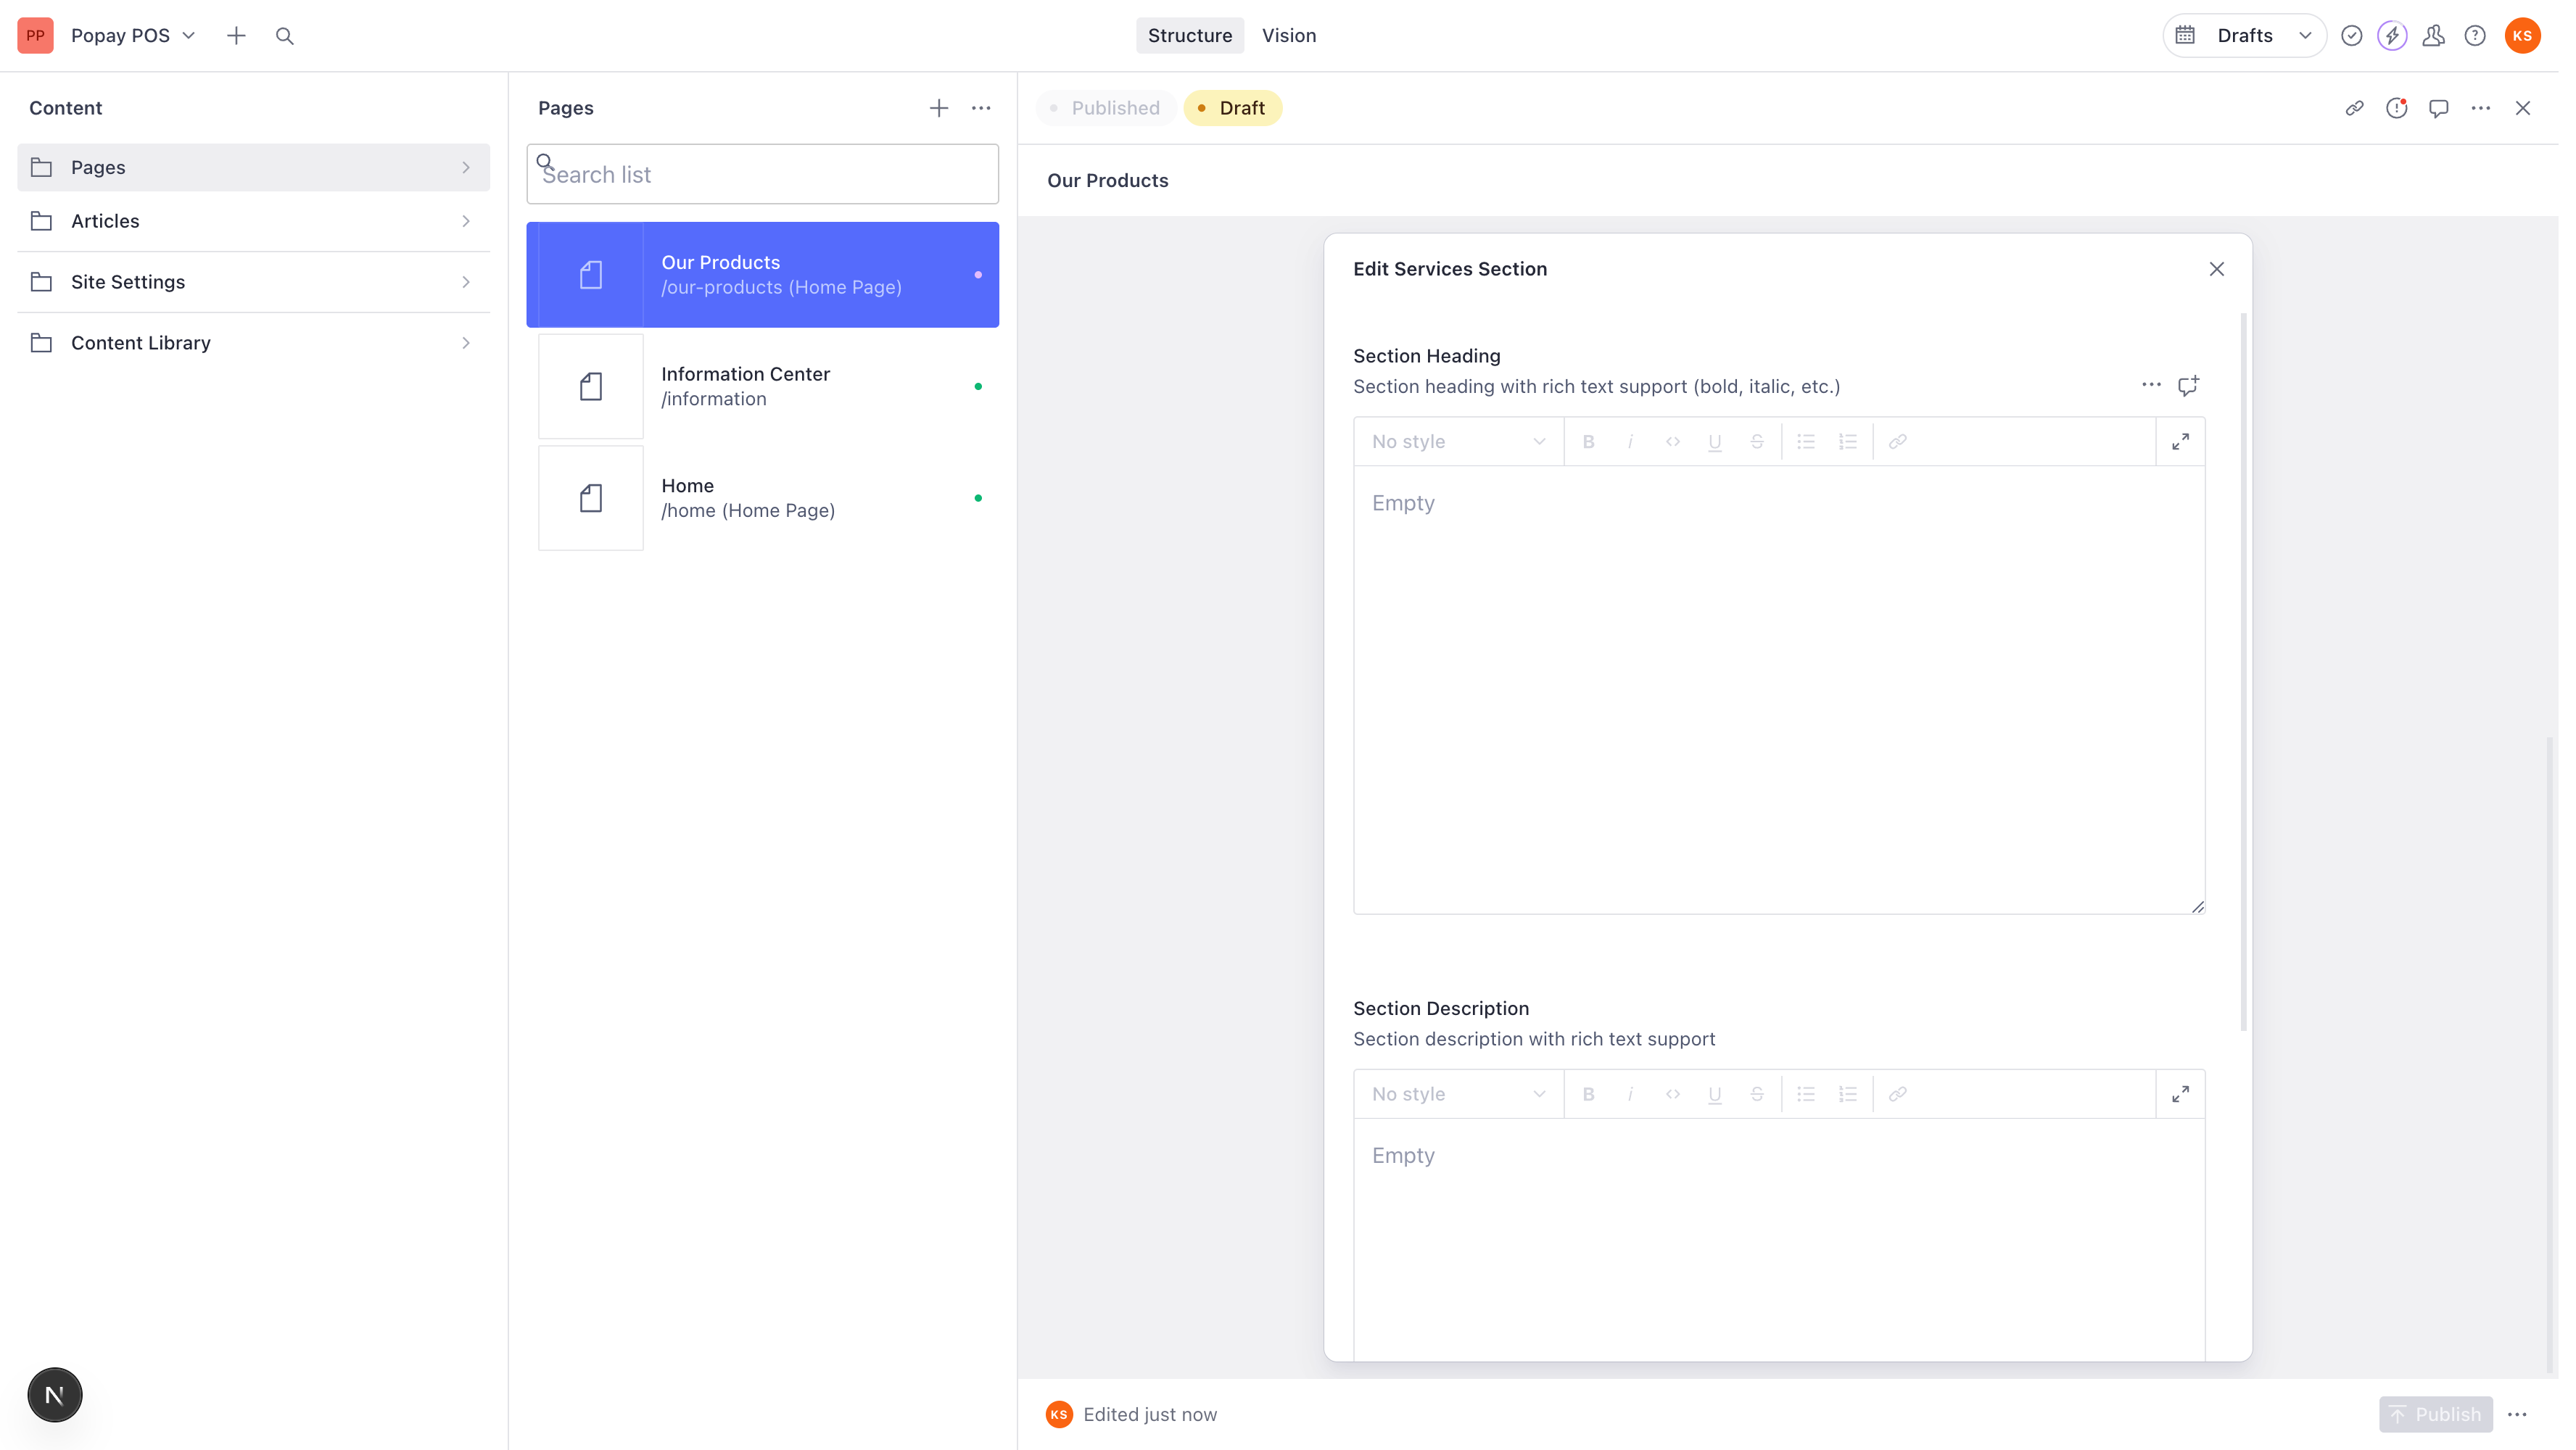
Section Configuration Fields:
Section Heading
- Rich text editor for the section title
- Supports formatting: bold, italic, code, underline, strikethrough
- Use the toolbar or keyboard shortcuts
- Click the expand icon (⛶) for full-screen editing
Section Description
- Rich text editor for section description
- Same formatting options as heading
- Provide context for the services section
Services
- Click Add item to add individual service items
- Each service can have its own content and details

- Fill in your content for each field
- Click outside the dialog or the X button to close it
- The section is automatically saved to your page
Step 10: Expanding the WYSIWYG Editor
For any rich text field, you can use the full-screen editor:
- Click the expand icon (⛶) in the top-right of the editor toolbar
- This opens a distraction-free writing mode
- Edit your content with full formatting options
- Press Escape or click outside to return to normal view
Step 11: Reordering Sections
You can change the order of sections on your page:
- Hover over any section in the Page Sections list
- Click and hold the drag handle (⋮⋮) on the left
- Drag the section up or down to reorder
- Release to drop it in the new position
The order here determines the order sections appear on your website.
Step 12: Deleting Sections
To remove a section you don't need:
- Hover over the section
- Click the three-dot menu (⋯) on the right
- Select Remove from the dropdown
- Confirm the deletion
Step 13: Configuring SEO Settings
Expand the SEO Settings section at the bottom to optimize your page for search engines:
- Meta Title - Custom title for search results (60 chars max)
- Meta Description - Description for search results (160 chars max)
- Meta Image - Image for social media sharing
- Keywords - Target keywords (comma-separated)
- Canonical URL - Preferred URL for duplicate content
Best Practices:
- Write unique descriptions for each page
- Use relevant keywords naturally
- Include your brand name in the title
- Use high-quality images for social sharing
Step 14: Publishing Your Landing Page
Once you've configured all sections and content:
- Look at the bottom-right corner of the screen
- You'll see the Publish button
- Click the Publish button
- Your landing page is now live on your website!
Publishing Status:
- Draft (🟡) - Changes not yet published
- Published (🟢) - Page is live
- Saved (💾) - Auto-saved in Studio
The system auto-saves your work, but you must click Publish to make it live on the website.
Step 15: Viewing Your Published Page
After publishing, you can:
- Click the Open preview button (🔗) in the top toolbar
- This opens your page on the live website
- Verify that all sections display correctly
- Check the page on mobile devices
Common Workflows
Creating a Product Landing Page
- Create new Home Page
- Add title: "Our Products"
- Generate slug: "our-products"
- Add sections:
- Hero Section (product showcase)
- Benefits Section (product features)
- Services Section (available products)
- Testimonials Section (customer reviews)
- Call to Action (sign up/purchase)
- Configure SEO settings
- Publish
Creating a Campaign Landing Page
- Create new Home Page
- Add title: "Spring Sale 2025"
- Generate slug: "spring-sale-2025"
- Add sections:
- Banner Section (campaign announcement)
- Result Section (statistics/deals)
- Pricing Section (special offers)
- FAQ Section (common questions)
- Call to Action (limited time offer)
- Set Show in Navigation to OFF (direct traffic only)
- Publish
Tips and Best Practices
Content Writing
- Use clear, action-oriented language
- Keep headlines short and impactful
- Break up long text into sections
- Use bullet points for scanability
Section Selection
- Start with Hero Section to grab attention
- Follow with Benefits to explain value
- Add social proof (Testimonials)
- End with strong Call to Action
Design Consistency
- Use consistent styling across sections
- Maintain brand colors and fonts
- Ensure proper image sizes
- Test on multiple devices
Performance
- Optimize images before uploading
- Use appropriate section types
- Avoid too many sections on one page
- Keep content concise and focused
Troubleshooting
"Invalid validation" errors
- Ensure all required fields are filled
- Check that title and slug are not empty
- Verify rich text fields have content
Sections not displaying
- Check if the page is published (not draft)
- Verify sections have content configured
- Ensure sections are valid for page type
Slug already exists
- Use the Generate button to create unique slugs
- Add year or descriptor: "products-2025"
- Check existing pages for conflicts
Quick Reference
| Action | Steps |
|---|---|
| Create Page | Pages → + icon → Home Page |
| Add Section | Scroll to Page Sections → Add item... → Select type |
| Edit Section | Click on section name → Edit in dialog |
| Reorder Sections | Drag ⋮⋮ handle up/down |
| Delete Section | Click ⋯ menu → Remove |
| Publish Page | Click Publish button (bottom-right) |
Need More Help?
- Check the main Content Creator Guide
- Review existing landing pages for examples
- Contact your technical team for assistance
- Visit Sanity Documentation
Last Updated: 2025-11-18 Tutorial Version: 1.0